
Direct Backup Architecture: Connecting Android to External SSDs

Modern Android ecosystems have evolved beyond simple cloud dependency. While Google One offers convenience, a local physical backup to an external SSD or high-capacity flash drive remains the gold standard for data sovereignty and high-speed recovery. To initiate this process, your device must support USB On-The-Go (OTG), a standard feature in nearly all modern smartphones utilizing USB-C architecture.
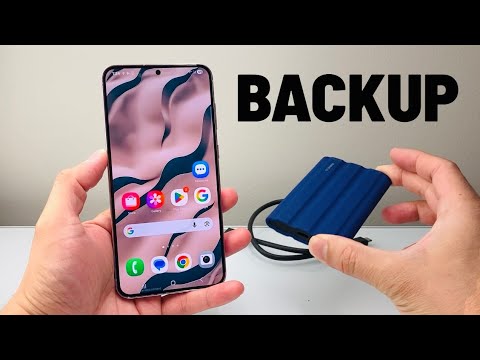
Before beginning the transfer, ensure your external drive is formatted to exFAT or FAT32. Most Android kernels struggle with NTFS without third-party driver intervention. Utilizing a high-speed NVMe SSD via a USB-C 3.1 or 3.2 interface is recommended to minimize thermal throttling and data bottlenecking during large-scale directory mirroring.
Hardware and Software Calibration

To successfully bridge your Android device and external storage, you require a USB-C to USB-C cable or a dedicated OTG adapter. Once the physical connection is established, the Android system should automatically trigger the USB Power Delivery and data mounting protocol. You will typically see a notification stating, "USB drive connected."
For a sophisticated, automated approach, Solid Explorer or MiXplorer are the preferred software choices. These applications allow for granular control over hidden system files and provide a more stable environment for multi-gigabyte transfers compared to stock file managers.
The AI-Enhanced Backup Workflow

At Smart AI Fix, we prioritize automation to eliminate human error. While manual "Copy and Paste" works for basic photos, it fails to capture structured application data or system configurations. To optimize this, users can leverage Tasker in conjunction with a file management plugin to create a "Plug-and-Sync" automation. This AI-logic workflow detects when a specific UUID (your SSD) is connected and automatically initiates a differential backup—only copying files that have changed since the last session.
For users within the Samsung or Pixel ecosystems, proprietary tools like Smart Switch (via external storage option) offer a more comprehensive image of the device, including home screen layouts and secure folder metadata.
AI Implementation Score: External Backup Efficiency
The following table evaluates the efficacy of local external backups versus traditional cloud-based methods through the lens of AI-driven data management.
| Metric | Score (1-10) | Technical Rationale |
|---|---|---|
| Data Transfer Speed | 9/10 | USB 3.1 speeds outperform 5G/Fiber uploads for multi-GB datasets. |
| Automation Potential | 8/10 | High with Tasker/MacroDroid integration for auto-syncing. |
| Security (Sovereignty) | 10/10 | Zero-knowledge architecture; data never leaves the physical hardware. |
| AI File Deduplication | 7/10 | Requires third-party software to identify and merge duplicate assets. |
Executing the Systematic Transfer

1. Connect the Hardware: Plug your SSD into the Android device. If prompted, change the USB mode from "Charging" to "File Transfer/MTP."
2. Directory Selection: Navigate to the Internal Storage root. For a full backup, target the DCIM (Photos/Videos), Documents, and Download folders. For application-specific data, focus on the Android/media path.
3. Initiate Mirroring: Long-press the selected folders, select Copy, and navigate to the root directory of your external drive. Select Paste.
4. Verification: Once the progress bar concludes, use a checksum tool or simply verify folder sizes to ensure data integrity. Always "Eject" or "Unmount" the drive via the notification shade before physical disconnection to prevent partition corruption.
By shifting to an external storage strategy, you bypass recurring cloud subscription fees and maintain a high-fidelity recovery point that is accessible even in offline environments. This is the ultimate Smart AI Fix for long-term digital preservation.
