
The transition from physical SIM cards to eSIM technology represents a significant leap in hardware miniaturization and software-defined connectivity. However, when an iPhone eSIM fails to activate or loses service, it is often due to a breakdown in the software handshake between the iOS core and the carrier’s provisioning server. As we move toward fully automated cellular environments, resolving these glitches requires a systematic approach to software diagnostics.
1. Verify Carrier Provisioning and Activation Status

Before modifying device settings, ensure that the cellular plan is active on your carrier’s side. An eSIM is essentially a digital certificate stored in the eUICC (Embedded Universal Integrated Circuit Card). If the carrier has not finalized the "push" of this profile, the iPhone cannot initialize the connection. Use the carrier’s mobile app or web portal to confirm the ICCID is mapped correctly to your device’s EID.
2. Execute a Network Environment Reset

Often, the iPhone’s network stack becomes desynchronized with local towers. Start with a simple Airplane Mode toggle (wait 15 seconds) to force a fresh signal search. If the "No Service" error persists, navigate to Settings > General > Transfer or Reset iPhone > Reset > Reset Network Settings. This action flushes caches, resets APN settings, and clears stored Wi-Fi passwords, allowing the AI-driven network selector to re-establish a clean link with the eSIM profile.
3. Software Update and Firmware Alignment

Apple frequently releases carrier settings updates and iOS patches that address modem firmware bugs. An outdated version of iOS may lack the necessary protocols to communicate with newer 5G eSIM configurations. Navigate to Settings > General > Software Update. Additionally, go to Settings > General > About and wait for a few seconds; if a carrier update is available, a prompt will appear automatically to optimize your eSIM performance.
4. Re-Scanning the QR Code or Manual Entry

If the eSIM profile is corrupted, it may need to be re-installed. Go to Settings > Cellular > Add eSIM. If you are using a QR code provided by your carrier, ensure the lighting is adequate for the camera's optical character recognition (OCR) to function. If the QR code fails, choose Enter Details Manually. This bypasses potential visual processing errors and allows you to input the SM-DP+ Address and Activation Code directly into the system's database.
AI Implementation Score
In the context of modern troubleshooting, we rate the efficiency of these solutions based on how much automation and software intelligence contribute to the fix.
| Fix Method | Efficiency Rating | AI Automation Potential |
|---|---|---|
| Network Reset | High | 90% (Automated Stack Rebuild) |
| Carrier Push | Medium | 75% (Server-side Automation) |
| iOS Update | Critical | 95% (Automated Patching) |
| Manual Entry | Low | 10% (Manual Data Input) |
5. Managing Dual SIM Conflicts
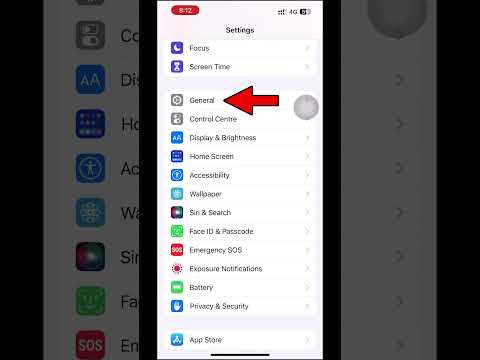
If you are using both a physical SIM and an eSIM, the DSDS (Dual SIM Dual Standby) logic might prioritize the wrong data path. Ensure your eSIM is selected as the Primary line for Cellular Data. Navigate to Settings > Cellular > Cellular Data and select your eSIM. Toggling "Allow Cellular Data Switching" can also help the iPhone’s internal logic determine the strongest available path via AI-based signal analysis.
