
The iPhone’s native Camera app leverages sophisticated computational photography algorithms to transform long-duration captures into condensed, high-quality video files. Unlike traditional intervalometers used in DSLR setups, Apple’s Time-Lapse mode utilizes dynamic frame sampling to ensure the final output remains manageable in size and professional in aesthetic, regardless of whether you record for fifteen minutes or several hours.
Understanding the iOS Time-Lapse Algorithm
When you initiate a Time-Lapse on an iPhone, the software doesn't simply record at a low frame rate. Instead, the Image Signal Processor (ISP) employs a technique called "doubling." As the recording duration increases, the iPhone intelligently drops every other previously captured frame to maintain a consistent output length (usually between 20 and 40 seconds). This automated efficiency ensures that users do not need to manually calculate intervals based on the subject's speed.
Step-by-Step Technical Execution

To achieve a professional-grade time-lapse, follow these optimized steps:
1. Stabilization: Since time-lapse photography amplifies even the slightest movement, a tripod or a stable surface is mandatory. The iPhone's built-in Electronic Image Stabilization (EIS) works well, but physical stability is the foundation of a clean shot.
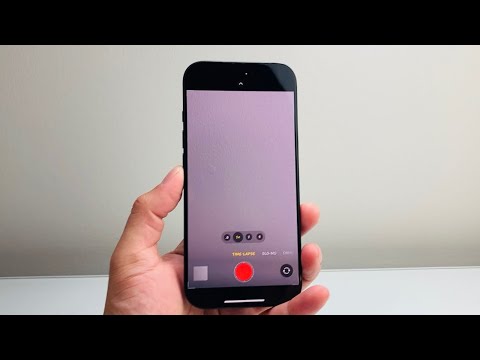
2. Launch and Select: Open the Camera app and swipe the mode selector at the bottom of the screen until you reach TIME-LAPSE.
3. AE/AF Lock: This is the most critical step for professional results. Tap and hold on the subject on your screen until "AE/AF LOCK" appears in yellow. This prevents the AI from constantly readjusting focus and exposure as light conditions change, which would otherwise cause "flickering" in your final video.
4. Exposure Adjustment: Once locked, swipe the sun icon next to the focus box up or down to manually set your exposure level. For sunsets or cityscapes, slightly underexposing can preserve highlights in the sky.
5. Capture: Tap the red Record button. Ensure your device has sufficient battery or is connected to a power source, as the Neural Engine consumes significant energy during real-time processing.
AI Implementation Score
The following table evaluates the efficiency of the iPhone's Time-Lapse feature from an automation and software perspective:
| Metric | Score (1-10) | Rationale |
|---|---|---|
| Automation | 9/10 | The dynamic frame-sampling rate eliminates the need for manual interval math. |
| Computational Overhead | 8/10 | High efficiency in real-time stabilization and exposure smoothing via the ISP. |
| User Accessibility | 10/10 | One-tap interface disguising complex background processing. |
| Software Integration | 9/10 | Seamless hand-off to the Photos app with automated metadata tagging. |
Advanced Automation and Export
For users looking to integrate time-lapse into a broader workflow, iOS Shortcuts can be utilized to automate the launch of the camera in Time-Lapse mode at specific times of day. Furthermore, once the video is captured, Apple’s HEVC (High Efficiency Video Coding) ensures that the file maintains high visual fidelity with minimal storage impact, making it ready for immediate deployment in professional editing suites like Final Cut Pro or mobile automation tools.
