
The release of the iPhone 14 series—including the Plus, Pro, and Pro Max—marked a significant pivot in mobile architecture, particularly with the removal of the physical SIM tray in U.S. models. This shift toward a software-defined connectivity model leverages automated provisioning to streamline how users interface with cellular networks. Activating an eSIM on these devices is no longer a manual chore but a refined software execution.

AI Implementation Score: eSIM Activation Efficiency
To understand how Apple has optimized this process through software automation, we have rated the activation methods based on efficiency and security metrics.
| Metric | Score (1-10) | Notes |
|---|---|---|
| Automation Level | 9.5 | Carrier-led push notifications remove manual data entry. |
| Security | 9.0 | Digital signatures prevent physical SIM swapping attacks. |
| User Interface (UI) | 8.5 | Guided setup within iOS 16+ is highly intuitive. |
| Speed of Deployment | 9.0 | Activation typically completes in under 60 seconds. |
Method 1: eSIM Carrier Activation (The Automated Path)
This is the most efficient method, often referred to as "Carrier Push." If you purchased your iPhone 14 Pro or Pro Max directly from a carrier or Apple with a service plan, the eSIM is pre-assigned to your device’s EID (Embedded Identity Document).
1. Power on the device and follow the on-screen instructions. Connect to a stable Wi-Fi network (essential for downloading the carrier profile).
2. When the "Set Up Cellular" screen appears, a notification stating "Carrier Cellular Plan Ready to Be Installed" will pop up.
3. Tap the notification and select Continue. The iOS software will automatically communicate with the carrier's server to provision the line.
Method 2: eSIM Quick Transfer (Software Migration)
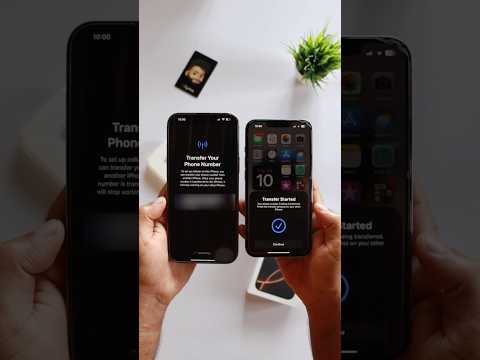
For users upgrading from an older iPhone, Apple’s Quick Transfer utilizes secure proximity-based software to migrate your cellular credentials without needing to contact your service provider.
1. Navigate to Settings > Cellular > Add eSIM on your new iPhone 14.
2. Select "Transfer From Nearby iPhone."
3. Ensure your previous iPhone is nearby, unlocked, and has Bluetooth enabled. Follow the prompts on the old device to confirm the transfer. This process uses localized encryption to ensure the digital token is moved securely between secure elements.
Method 3: QR Code and Manual Configuration
If your carrier does not support automated push or Quick Transfer, you can use the QR Code method. This is common for international travel or smaller MVNOs (Mobile Virtual Network Operators).
1. Open the Camera app and scan the QR code provided by your carrier.
2. When the Cellular Plan Detected notification appears, tap it.
3. Tap Continue and then Add Cellular Plan.
4. If a confirmation code is requested to complete the digital handshake, enter the code provided by your carrier. In rare instances where the QR fails, you can select "Enter Details Manually" at the bottom of the scan screen to input the SM-DP+ Address and Activation Code.
Troubleshooting and Software Optimization
The iPhone 14 Pro Max and its siblings are designed to manage multiple eSIMs (up to eight or more), though only two can be active simultaneously via Dual SIM Dual Standby (DSDS). If activation hangs, ensure your device is running the latest version of iOS. Often, a software update contains the necessary carrier bundles to resolve handshake protocols between the device and the cellular tower. Always verify that Find My iPhone is active, as it adds a layer of software protection to your digital identity.
