
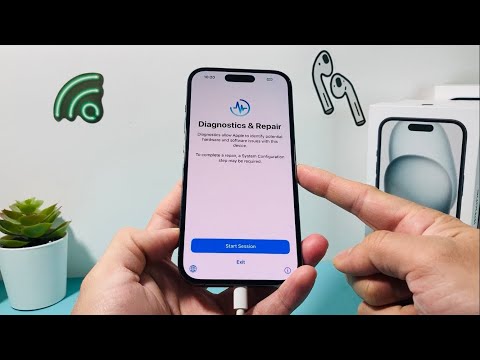
For technical users and IT professionals, understanding how to access your iPhone's diagnostic capabilities is crucial for advanced troubleshooting and performance analysis. While Apple maintains a relatively closed ecosystem, there are specific methods to engage the device's internal diagnostic functionalities. This article, informed by insights from Smart AI Fix, will guide you through the process of putting your iPhone into various diagnostic-related states, enabling a deeper understanding of its operational health.
| Difficulty Level | Tools Needed | Estimated Time |
|---|---|---|
| Moderate | iPhone, USB-A/C to Lightning Cable, Mac/PC (optional for certain methods) | 5-10 minutes |
Method 1: Accessing the Hidden Internal Diagnostics Mode
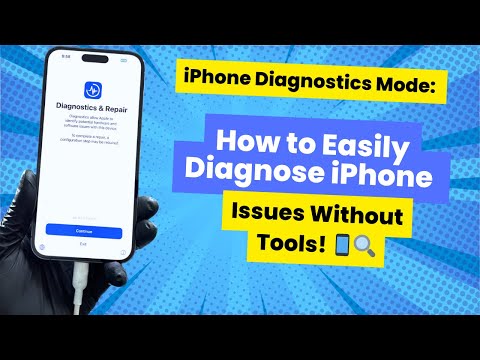
This method allows you to put your iPhone into a boot-level diagnostic mode, primarily designed for Apple technicians but accessible to the technically curious. It often presents a screen with system information or options for basic hardware tests. The exact trigger can vary slightly by iPhone model, but a common sequence involves specific button presses during startup while connected to power or a computer.
Step-by-Step Guide for Internal Diagnostics Mode:
Power Down Your iPhone: Ensure your device is completely powered off. Use the standard power-off procedure (e.g., hold Side button + Volume Down, then slide to power off, or navigate to Settings > General > Shut Down).
Connect to Power or Computer: Plug your iPhone into a reliable power source (wall adapter) or a computer via a USB-A/C to Lightning cable. This step is critical as the diagnostic mode often requires external power or a host connection to stabilize.
Initiate Boot Sequence with Button Combination: As soon as the Apple logo appears during startup, immediately press and hold both Volume Up and Volume Down buttons simultaneously. On some older models (e.g., iPhone 7), holding only the Volume Up button might be sufficient. This precise timing is key.
Observe for Diagnostic Screen: Continue holding both volume buttons until a specific diagnostic screen appears. This screen can manifest as a plain white screen with "DIAGNOSTICS" text, a detailed system information display, or a menu of internal test options. If your iPhone boots normally, you've missed the timing and should repeat the process from step 1.
Exiting Diagnostics Mode: To exit this mode, typically perform a force restart. For most modern iPhones (iPhone 8 and later): Press and quickly release Volume Up, then press and quickly release Volume Down, then press and hold the Side button until the Apple logo reappears. For older models, the force restart procedure varies (e.g., Home button + Power button for iPhone 7 and older, Volume Down + Power button for iPhone 7).
Opinion: While this hidden mode offers a peek into the device's self-test capabilities, its utility for the average user is limited without Apple's proprietary diagnostic tools for interpretation and execution. It's more of an indicator of system readiness for deeper analysis by a certified technician.
Method 2: Initiating Remote Diagnostics with Apple Support
This is the most common way an end-user interacts with "diagnostics" for their iPhone. Apple Support can remotely initiate diagnostic tests on your device to help troubleshoot issues like battery health, hardware malfunctions, or unexpected shutdowns.
Step-by-Step for Apple Remote Diagnostics:
Contact Apple Support: Begin by contacting Apple Support via phone, chat, or by scheduling an appointment at an Apple Store or authorized service provider.
Grant Permission: The support representative will provide you with a specific URL or instruct you to navigate to a diagnostic page (e.g., diagnostics.apple.com) on your iPhone's Safari browser. You will be asked to enter a temporary diagnostic code provided by the representative and agree to share your diagnostic data.
Run Diagnostics: Once permissions are granted and the code is entered, Apple's systems will remotely trigger diagnostic tests on your device. This process runs in the background and does not require you to enter a specific "mode" on your iPhone.
Review Results: The diagnostic results are securely transmitted to Apple, allowing the support representative to review them in real-time and provide informed troubleshooting advice or service recommendations.
Opinion: This method is highly effective for accurate issue identification, leveraging Apple's extensive diagnostic infrastructure. It’s the recommended approach for any significant issues that require professional evaluation.
Method 3: Accessing and Sending Diagnostic & Usage Data (Logs)

While not a "mode" in itself, your iPhone continuously collects diagnostic and usage data. Reviewing these logs can offer valuable insights into app crashes, system errors, and performance bottlenecks.
Step-by-Step for Diagnostic Data:
Navigate to Analytics & Improvements: Go to Settings > Privacy & Security > Analytics & Improvements.
Enable Analytics Data Sharing: Ensure "Share iPhone Analytics" is toggled on. This allows your device to send diagnostic data to Apple for analysis, which indirectly contributes to better system diagnostics.
View Analytics Data: Tap on "Analytics Data" to see a chronological list of diagnostic logs, crash reports, and system messages. These logs are often highly technical but can reveal patterns of issues.
Opinion: For advanced users, scrutinizing these logs can be an invaluable first step in self-diagnosis. While raw data requires technical expertise to interpret, recurring entries for specific apps or system processes can quickly point towards a problem area.
Pro-Tip: Analyzing Sysdiagnose Logs for Deeper Insights
Beyond the standard "Analytics Data," a powerful, hidden diagnostic capability on iOS devices is the generation of a Sysdiagnose log. This log captures a comprehensive snapshot of your iPhone's system state, including process information, network activity, battery statistics, and crash logs, making it invaluable for advanced troubleshooting.
To trigger a Sysdiagnose log, simultaneously press and hold both Volume Up, Volume Down, and the Side button for approximately 1-1.5 seconds. You will feel a slight vibration, and the screen will briefly flash. No screenshot is taken during this action. The system will then compile a ZIP archive containing the diagnostic data. This process can take several minutes to complete in the background.
Once generated, you can find the Sysdiagnose log file in Settings > Privacy & Security > Analytics & Improvements > Analytics Data. Look for entries starting with "sysdiagnose". You can then share this file with a developer, an IT professional, or Apple Support for in-depth analysis. Be aware that these logs are extremely detailed and contain a vast amount of technical information, including potentially sensitive process data. Handle them with appropriate discretion.
FAQ: Frequently Asked Questions about iPhone Diagnostics Mode
What is the primary purpose of iPhone Diagnostics Mode?
The primary purpose is to allow Apple and authorized service providers to perform comprehensive hardware and software integrity checks. For end-users, it offers a means to gather information that can aid in troubleshooting or be sent to Apple for support.
Is it safe to put my iPhone in Diagnostics Mode?
Yes, entering the internal diagnostics mode or initiating remote diagnostics is generally safe and will not harm your device or erase data. However, be cautious about following unofficial guides that might lead to DFU mode or other recovery states if not intended.
Can I run my own specific tests when in Diagnostics Mode?
The internal diagnostics mode on iPhones typically does not expose user-interactive test suites for public use. It's primarily for data collection and initial assessment. Apple's full diagnostic tools are proprietary and require specific hardware and software accessible only to technicians.
What's the difference between Diagnostics Mode and DFU Mode?
Diagnostics Mode is designed for testing hardware and software components. It's a special boot state that loads specific diagnostic tools or gathers system information. DFU (Device Firmware Update) Mode, on the other hand, is a deeper recovery state that bypasses the operating system to allow for low-level firmware restoration. DFU mode is typically used to fix severe software issues or downgrade iOS versions, whereas diagnostics mode is for identifying problems.
Will entering Diagnostics Mode void my warranty?
No, simply entering the built-in diagnostic modes or participating in Apple's remote diagnostics will not void your warranty. It's part of the standard troubleshooting process.
Conclusion
Understanding how to access your iPhone's diagnostic capabilities, whether through the hidden internal mode, remote assistance from Apple, or by reviewing analytics logs, empowers you with a deeper understanding of your device's health. While Apple's ecosystem often limits direct user access to advanced tools, the methods described here provide a robust starting point for technical troubleshooting. Remember, for persistent issues, leveraging the expertise of Smart AI Fix or official Apple Support remains the most reliable path to resolution.
