
Experiencing your AirPods not turning on can be an incredibly frustrating issue, especially when you're looking forward to listening to music, podcasts, or taking an important call. Many users encounter this problem, often mistaking it for a major hardware malfunction when, in fact, it can frequently be resolved with simple troubleshooting steps. This comprehensive guide, informed by insights from Smart AI Fix, will meticulously walk you through a series of diagnostic and remedial actions to bring your AirPods back to life.
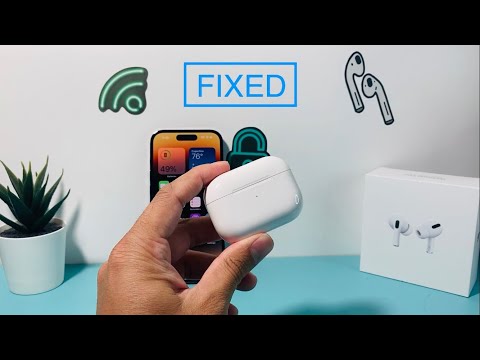
Whether you own AirPods Pro, AirPods (2nd generation), AirPods (3rd generation), or even the original AirPods, the underlying principles for resolving power-related issues remain largely consistent. Our aim is to provide clear, actionable advice that empowers you to identify the root cause of the problem and implement an effective solution without immediate recourse to professional repair services. Understanding the nuances of AirPod charging and connectivity is crucial for successful problem resolution.
Before proceeding with complex solutions, it is always wise to start with the most basic checks. Often, the solution is much simpler than anticipated, saving you time and potential stress. This structured approach ensures no stone is left unturned in your quest to revive your non-responsive AirPods.
Requirements for Troubleshooting
Before diving into the troubleshooting process, ensure you have the following items readily available. Having these on hand will streamline your efforts and allow you to perform each step efficiently and effectively.
Your AirPods and their charging case.
A Lightning to USB cable or USB-C to Lightning cable, depending on your AirPods model and power adapter, preferably the original Apple cable or a MFi-certified alternative.
A reliable power source (such as a functional wall adapter, a computer USB port, or a tested power bank) to ensure adequate power delivery.
A soft, dry, lint-free cloth or clean cotton swabs specifically designed for delicate electronics for thorough cleaning.
A device previously paired with your AirPods (e.g., iPhone, iPad, or Mac) to check connectivity and access settings.
A clean, well-lit workspace to allow for clear inspection of your AirPods and their components.
Step-by-Step Resolution for AirPods Power Issues
Follow these steps sequentially, progressing from the simplest and most common solutions to more advanced diagnostics. Each step addresses a frequent cause for AirPods failing to power on.
1. Verify Charging Case Battery Status
The most common reason for AirPods not turning on is a completely depleted charging case. Your AirPods draw power directly from the case to charge, so if the case itself is dead, the AirPods will not receive any charge or be able to connect.
Open the charging case lid with the AirPods inside. If the status light on the case is off, flashing amber, or solid red, it indicates a low or no battery charge. A solid green light typically signifies a full charge. If the light is off or indicates low battery, proceed to charge the case immediately.
Connect your charging case to a power source using the appropriate charging cable. For Wireless Charging Cases (AirPods 2nd Gen, 3rd Gen, Pro), place it on a Qi-certified wireless charging mat. Observe the status light; it should turn amber to indicate active charging. Once the case is fully charged, the light will turn green, signaling readiness.
2. Ensure AirPods are Seated Correctly in the Case
Even if the charging case itself is charged, your AirPods might not power on if they are not making proper electrical contact with the charging pins inside the case. This can often be due to misalignment or partial obstruction.
Gently remove both AirPods from their charging case. Visually inspect the bottom of each AirPod and the interior charging wells of the case. Then, reinsert them firmly and precisely into their respective slots. Ensure they feel secure and click into place if applicable.
The status light on the case should briefly illuminate when an AirPod is inserted or removed, indicating that the case recognizes its presence. If only one AirPod lights up the status indicator, it suggests an issue with the seating or connection of the other.
3. Clean AirPods and Charging Case Contacts
Accumulated dirt, lint, earwax, or other debris on the metal charging contacts of your AirPods and the corresponding pins inside the charging case can create an insulating barrier, preventing proper electrical flow.
Using a soft, dry, lint-free cloth or a dry cotton swab, very carefully clean the small metal charging contacts located at the bottom of each AirPod stem. Pay close attention to any visible grime or residue.
Similarly, clean the delicate charging pins situated inside the AirPods charging case's wells. For stubborn debris, a dry, soft-bristled brush or a toothpick (used with extreme caution to avoid damage) can help dislodge material. Ensure no moisture is introduced during cleaning.
4. Try a Different Charging Cable and Power Adapter
A common but overlooked culprit can be a faulty charging cable or a malfunctioning power adapter. Cables can develop internal breaks or frays, and adapters can fail without any obvious external damage, leading to inconsistent or no power delivery to the charging case.
Swap out your current Lightning to USB or USB-C to Lightning cable for another known good and functional cable. Preferably, use an original Apple cable or a certified MFi (Made for iPhone/iPad/iPod) accessory to rule out compatibility issues.
Additionally, try connecting your AirPods charging case to a different power adapter or a different USB port (e.g., on a computer or another wall outlet). This diagnostic step helps isolate whether the issue lies with the AirPods charging system or the external power supply components. Observe if the charging indicator light behaves differently with the new setup.
5. Force Restart the AirPods
Sometimes, your AirPods might encounter a temporary software glitch or a frozen state that prevents them from turning on or connecting. A force restart can often resolve these transient software hang-ups without affecting your data.
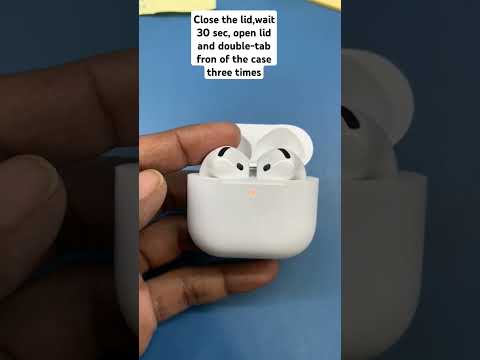
Place both AirPods into their charging case and securely close the lid. Allow them to sit undisturbed for approximately 30 seconds. After 30 seconds have passed, open the lid of the charging case.
While the lid remains open and the AirPods are inside, locate and press and hold the small circular setup button situated on the back of the charging case. Continue holding this button for about 15-20 seconds until the status light on the front of the case flashes amber a few times, then changes to a flashing white light. This sequence indicates a successful force restart of the AirPods' internal firmware.
6. Reset Your AirPods
If a force restart does not resolve the issue, a full factory reset might be necessary. This process erases all custom settings, firmware glitches, and pairing information, returning your AirPods to their default, out-of-the-box state. This is a more drastic but often effective step.
With both AirPods securely in their charging case and the lid open, navigate to your paired iPhone, iPad, or Mac. For iOS/iPadOS, go to Settings > Bluetooth. Find your AirPods in the list, tap the blue "i" icon (information icon) next to their name, and then select Forget This Device. Confirm your decision in the subsequent prompt.
Next, with the AirPods still inside the open case, press and hold the setup button on the back of the case for approximately 15-20 seconds. The status light will first flash amber, then transition to a consistent white light. Once the light flashes white, your AirPods have been successfully reset. You can now attempt to re-pair them by holding the open case near your iPhone/iPad and following the on-screen pairing instructions.
7. Update iOS/iPadOS/macOS Software
Outdated software on your connected Apple device (iPhone, iPad, or Mac) can occasionally lead to compatibility, connectivity, and performance issues with your AirPods. Apple regularly releases software updates that include vital bug fixes and performance enhancements for their accessories.
Ensure your iPhone, iPad, or Mac is running the latest available version of its respective operating system. On an iPhone or iPad, go to Settings > General > Software Update. On a Mac, navigate to System Settings > General > Software Update. Download and install any pending updates.
After the software update is complete and your device has restarted, attempt to connect your AirPods again. Sometimes, firmware updates for the AirPods themselves are delivered implicitly through these system updates when your AirPods are connected to the device.
8. Check for Physical Damage or Liquid Exposure
Visually inspect your AirPods and their charging case for any discernible signs of physical damage, such as visible dents, cracks, significant scratches, or corrosion. Liquid exposure can severely compromise internal electronic components, often leading to complete power failure or erratic behavior.
Carefully examine the charging ports, speakers, microphones, and any crevices for discoloration, moisture residue, or foreign substances. If you suspect liquid damage or discover obvious physical damage, the internal circuitry is likely compromised. While some newer AirPods models (AirPods Pro and AirPods 3) offer a degree of water resistance, they are not waterproof, and prolonged exposure or submersion can be fatal. Liquid damage is typically not covered under Apple's standard warranty.
In such unfortunate cases, professional repair or replacement of the affected AirPod or the entire set might be the only viable solution, as internal damage is beyond user repair capabilities.
9. Attempt to Connect to a Different Device
To definitively rule out an issue stemming from your primary device's Bluetooth module or software, try pairing your AirPods with a different, known-good Apple device if one is available. For instance, if they fail to connect to your iPhone, attempt to pair them with an iPad, another iPhone, or a Mac.
If your AirPods connect and function normally with the alternative device, this strongly suggests that the problem lies with the original device's Bluetooth settings, software configuration, or potentially a hardware fault in that device. If, however, the AirPods still fail to power on or connect with a different device, it further points to an inherent issue with the AirPods themselves or their charging system, necessitating further investigation or professional service.
AirPods Troubleshooting Matrix

This comprehensive table summarizes common AirPods power-related symptoms and their typical solutions, providing a quick reference for immediate troubleshooting and diagnosis.
Symptom |
Probable Cause |
Primary Fixes |
|---|---|---|
AirPods completely unresponsive, no indicator lights visible on case. |
Dead charging case, poor contact with AirPods, or severe battery discharge of AirPods. |
Charge the case fully, re-seat AirPods firmly, meticulously clean all charging contacts, test with a different charging cable and power adapter. |
Case light flashes amber or green intermittently, but AirPods will not connect or power on. |
AirPods not fully charged, internal software glitch, or pairing corruption. |
Ensure AirPods are fully charged inside the case, perform a force restart of the AirPods, execute a full factory reset and re-pair. |
Only one AirPod functions correctly, the other remains off or unresponsive. |
Individual AirPod not charging, dirty contacts for that specific AirPod, or an isolated hardware fault in the non-working AirPod. |
Clean the charging contacts of the problematic AirPod and its corresponding well in the case, re-seat it, try a force restart, then a full reset. |
AirPods connect and turn on, but exhibit very short battery life after a full charge. |
Degraded internal battery health, improper charging cycles, or outdated firmware. |
Ensure full charge cycles (avoid frequent partial charges), check for AirPods firmware updates via connected iOS/iPadOS/macOS device, consider Apple's battery service. |
AirPods show "Not Connected" or "Disconnected" despite being in an open case and in range. |
Bluetooth interference, software glitch on the connected device, or a persistent pairing issue. |
Forget the device and perform a full re-pairing procedure, update your device's operating system, force restart the AirPods, try connecting to another device. |
Frequently Asked Questions About AirPods Power Issues
Here are detailed answers to some of the most common questions users have regarding AirPods that won't turn on, charge properly, or exhibit power-related malfunctions.
Q: How do I definitively know if my AirPods are actually charging inside the case?
A: When your AirPods are placed within the charging case and the lid is open, the status light on the case indicates their charge status. A solid green light signifies that the AirPods are fully charged (or the case is fully charged if no AirPods are present). An amber light indicates that less than one full charge remains for the AirPods. If the case itself is connected to power, the light will typically be amber while charging and turn green once the case is fully charged.
Q: My AirPods charging case is fully charged (green light), but the AirPods themselves still won't charge or turn on. What could be the issue?
A: This scenario frequently points to dirty or obstructed charging contacts, or the AirPods not being properly seated within the case. Ensure that both the metallic contacts on the bottom of each AirPod and the charging pins inside the case's wells are meticulously clean and free of debris. Verify that each AirPod is firmly and correctly placed in its respective slot. If cleaning doesn't work, a deeper software glitch or a faulty individual AirPod could be the cause, warranting a force restart or a full factory reset.
Q: Can exposure to extreme temperatures adversely affect AirPods battery performance and charging capabilities?
A: Yes, both excessively high and extremely low temperatures can significantly impact the performance and charging efficiency of your AirPods' lithium-ion batteries. Apple officially recommends using and charging AirPods within an ambient temperature range of 0° to 35° C (32° to 95° F). Operating or charging them outside this recommended range can temporarily reduce battery life, slow down charging, or, in severe prolonged cases, permanently degrade the battery's overall health and capacity.
Q: Is it safe or advisable to clean AirPods with rubbing alcohol or other harsh cleaning agents?
A: Apple specifically advises against using harsh chemicals, aerosol sprays, solvents, or abrasive materials when cleaning your AirPods or their charging case. For general exterior cleaning, a slightly dampened cloth with plain water is generally safe. For stubborn dirt or earwax on the speaker mesh or charging contacts, a dry cotton swab or a soft-bristled, dry brush is recommended. It is crucial to avoid introducing any liquid into the AirPods' openings, as this can cause irreversible damage not covered by warranty.
Q: What does a rapidly flashing amber light on the AirPods charging case specifically indicate?
A: A rapidly flashing amber light on the AirPods charging case usually indicates a setup error, a pairing issue, or that your AirPods need to be reset. It can also signify that there is an internal problem with one of the AirPods not connecting or charging correctly with the case. The most common first step to address a flashing amber light is to perform a full factory reset: press and hold the setup button on the back of the case until the light flashes amber a few times, then consistently white.
Q: My AirPods got wet; will they still turn on after drying?
A: If your AirPods or their charging case have been exposed to liquid, it is critical to immediately dry them thoroughly. Do not, under any circumstances, attempt to charge them, place them in the charging case, or try to power them on until they are completely dry, which can take several hours (or even days) depending on the extent of exposure. While newer AirPods models (like AirPods Pro and AirPods 3) offer some level of sweat and water resistance for non-water sports and exercise, they are not fully waterproof, and liquid damage is typically not covered under Apple's warranty. Attempting to power on wet AirPods can short-circuit the internal components and cause irreparable damage.
Conclusion
When your AirPods refuse to power on, it's a common inclination to assume the worst and anticipate an expensive repair or replacement. However, as meticulously demonstrated by this detailed troubleshooting guide, a significant majority of these issues can be effectively resolved with a systematic and patient approach to diagnosis and repair.
From simply ensuring your charging case has sufficient power and cleaning accumulated debris from critical contacts, to performing more advanced actions like a force restart or a full factory reset, the steps outlined here are designed to cover the vast majority of scenarios users might encounter. The key to success lies in systematically working through each potential fix.
Remember that patience and meticulous attention to detail are paramount throughout this diagnostic process. By diligently following these instructions and troubleshooting steps, you significantly increase your chances of getting your AirPods functioning optimally and reliably again. Should you exhaust all of these comprehensive options and your AirPods still remain inoperable, it may then be an appropriate time to contact Apple Support for professional technical assistance or to explore potential replacement options. This structured, methodical problem-solving approach, fully advocated by Smart AI Fix, ensures that you have thoroughly explored all user-manageable solutions before escalating to more drastic or professional interventions.
