
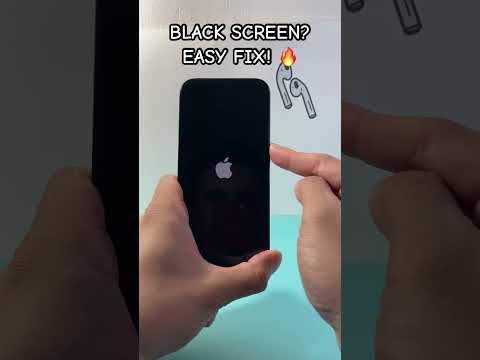
The sudden appearance of an iPhone black screen can be an alarming experience for any user, often signaling anything from a minor software glitch to a significant hardware malfunction. As a senior technical SEO expert, I've observed that a substantial percentage of these incidents are resolvable through systematic, user-initiated troubleshooting, minimizing the need for costly professional intervention. This article, guided by a 'Smart AI Fix' methodology, details a technical approach to diagnose and rectify the most common causes of an unresponsive black iPhone display.
| Difficulty Level | Tools Needed | Estimated Time |
|---|---|---|
| Easy to Moderate | iPhone, USB-C/Lightning Cable, Computer (Mac/PC with iTunes/Finder), Internet Access (Optional) | 5 - 30 Minutes |
Phase 1: Initial Diagnostics and Soft Resets

1.1 The Forced Restart Protocol
Often, a black screen is merely the manifestation of a frozen operating system or an application crash that has rendered the display unresponsive. A forced restart, unlike a standard power cycle, bypasses the software layer and directly reboots the device's kernel, clearing temporary memory and resolving many software-related hangs.
For iPhone 8, SE (2nd and 3rd gen), X, 11, 12, 13, 14, 15 series:
Quickly press and release the Volume Up button.
Quickly press and release the Volume Down button.
Press and hold the Side button until the Apple logo appears. This can take 15-20 seconds. Do not release prematurely.
For iPhone 7 and iPhone 7 Plus:
Press and hold both the Volume Down button and the Side button simultaneously.
Continue holding until the Apple logo appears.
For iPhone 6s, 6s Plus, and older, including iPhone SE (1st gen):
Press and hold both the Home button and the Side (or Top) button simultaneously.
Continue holding until the Apple logo appears.
If the Apple logo appears, release the buttons and allow your iPhone to boot normally. This is a strong indicator that the issue was software-related.
1.2 Power Cycle and Charging Verification
An utterly depleted battery can also present as a black screen, with no visual cues. While seemingly obvious, this step is frequently overlooked.
Connect your iPhone to a known good power source using an original or MFi-certified Lightning/USB-C cable. Ensure the wall adapter or charging port is also functioning correctly. Leave the device connected for at least 30 minutes. If the battery was merely drained, you should eventually see the charging screen or the Apple logo. Pay attention to the charging indicator; if it doesn't appear after some time, investigate your charging accessories.
Phase 2: Advanced Software Recovery Methods

2.1 Entering Recovery Mode
If a forced restart yields no results, the operating system might be corrupted or deeply stalled. Recovery Mode allows you to connect your iPhone to a computer and use iTunes (Windows/older macOS) or Finder (macOS Catalina and later) to update or restore the iOS. This mode does not typically require the screen to be functional.
Steps to Enter Recovery Mode:
Ensure your computer has the latest version of iTunes or macOS.
Connect your iPhone to your computer using a USB-C or Lightning cable.
Perform the forced restart button sequence for your specific iPhone model (as described in 1.1), but do not release the final button (Side/Volume Down/Home) when the Apple logo appears. Instead, continue holding until you see the Recovery Mode screen (an image of a computer and a cable).
On your computer, iTunes or Finder will detect an iPhone in recovery mode. You will be presented with options to Update or Restore.
Always attempt "Update" first. This action attempts to reinstall iOS without erasing your data. If the update fails or doesn't resolve the black screen, then proceed with "Restore." Be aware that Restore will erase all data on your iPhone and install a fresh copy of iOS. This is a drastic but often necessary step for severe software corruption.
2.2 DFU Mode (Device Firmware Update)
DFU Mode is the deepest restore option available, bypassing the boot loader entirely. It's used for severe firmware corruption or when Recovery Mode is inaccessible. Entering DFU Mode is more complex and requires precise timing. Data loss is practically guaranteed with a DFU restore.
Steps to Enter DFU Mode (for iPhone 8 and later, similar principles apply to older models with different button combos):
Connect your iPhone to your computer with iTunes/Finder running.
Quickly press and release the Volume Up button.
Quickly press and release the Volume Down button.
Press and hold the Side button for 10 seconds (the screen should remain black).
While still holding the Side button, press and hold the Volume Down button for 5 seconds.
Release the Side button but continue holding the Volume Down button for another 10 seconds.
If your screen remains black and your computer detects an iPhone in DFU mode (with no screen display on the iPhone itself), you have successfully entered DFU mode. If the Apple logo or "connect to iTunes" screen appears, you've missed a step and need to restart.
Once in DFU Mode, iTunes/Finder will prompt you to "Restore iPhone." This will completely erase and reinstall the firmware and iOS. This is often the final software-based solution for a persistent black screen.
Pro-Tip: Advanced Backlight and Display Connectivity Diagnostics
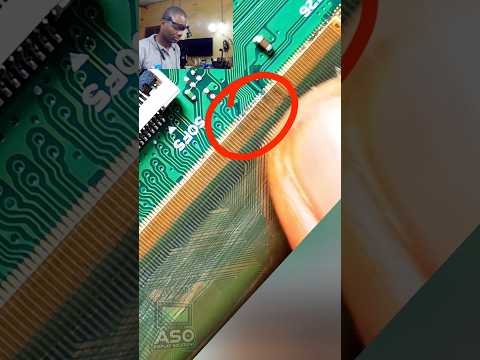
Before concluding that a black screen signifies a total display panel failure or logic board issue, perform a quick backlight integrity check. In a dimly lit room, with your iPhone powered on (or presumed to be powered on after a forced restart), shine a bright flashlight at a sharp angle across the screen. Look for faint images, app icons, or text. If you can discern any content, even barely, it suggests that the LCD/OLED panel itself is functioning, but the backlight component has failed. This indicates a potentially less severe hardware issue (e.g., a loose display cable or a dedicated backlight circuit failure) compared to a completely dead display panel, which would show no visual information whatsoever. This distinction is crucial for accurate repair assessments, guiding technicians towards targeted component-level repair rather than an immediate full display replacement.
FAQs: iPhone Black Screen
Why did my iPhone screen go black suddenly?
Common causes include software crashes, critical battery depletion, physical impact damage, water damage, or a failing display assembly or logic board component.
Will a force restart erase my data?
No, a force restart is a safe procedure that does not erase any data on your iPhone. It simply reboots the operating system.
What if my iPhone screen is black but I can still hear sounds or feel vibrations?
This is a strong indicator that the iPhone's internal components (processor, RAM, storage) are functional, but the display assembly or its connection to the logic board has failed. This points towards a hardware display issue rather than a complete system failure.
What if none of these steps work and my iPhone remains black?
If all software recovery methods (forced restart, Recovery Mode, DFU Mode) fail, it is highly probable that your iPhone is experiencing a hardware failure. This typically necessitates professional repair from an Apple Store or an authorized service provider.
Can water damage cause a black screen?
Absolutely. Water ingress can short circuit internal components, corrode connectors, or damage the display assembly itself, leading to a black and unresponsive screen.
Conclusion
The iPhone black screen, while intimidating, is frequently a remediable issue through systematic software troubleshooting. By diligently following the 'Smart AI Fix' protocols—commencing with simple forced restarts, progressing to charging verification, and then escalating to Recovery and DFU modes—users can resolve many instances without external assistance. However, when these technical interventions prove insufficient, it's a clear signal for a hardware diagnosis by qualified professionals. Understanding these steps empowers users to effectively navigate and potentially self-resolve a common and frustrating technical problem, ensuring data integrity where possible and making informed decisions regarding professional repairs.
