
Removing a camera lens protector from your iPhone can be a delicate operation, yet it's often necessary to restore your device's optical clarity, address damage, or upgrade to a superior protector. While many protectors offer crucial defense against scratches and impacts, improper installation, poor quality materials, or prolonged use can lead to issues like degraded image quality, reflections, or even adhesive failure. This comprehensive guide, informed by the expertise at Smart AI Fix, will equip you with the knowledge and techniques for safe and effective removal, ensuring your iPhone camera functions optimally.
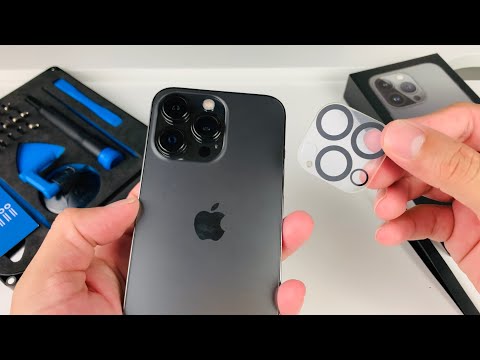
Requirements for Safe Lens Protector Removal
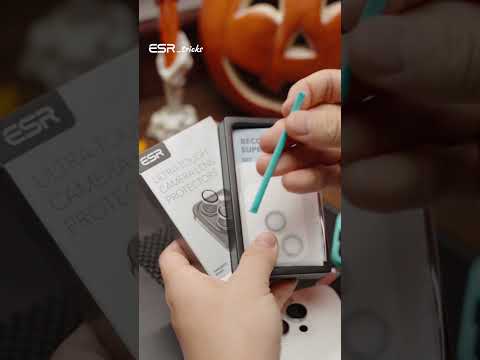
Before beginning the removal process, gather the following tools to ensure a smooth and damage-free experience:
- Microfiber Cloth: Essential for pre-cleaning and post-removal residue management, preventing scratches.
- Isopropyl Alcohol (IPA) 70% or 90% (Optional but Recommended): For dissolving stubborn adhesive residue without damaging the iPhone's camera lens or surrounding finishes.
- Hairdryer or Heat Gun (Use with Extreme Caution): Gentle, controlled heat can soften adhesive, making removal easier. NEVER overheat your iPhone.
- Plastic Prying Tool, Guitar Pick, or Thin Plastic Card: For gently lifting edges without scratching the iPhone's chassis or camera module. Avoid metal tools.
- Strong Adhesive Tape (e.g., Duct Tape or Packing Tape): Useful for creating a grip on shattered protectors or lifting small fragments.
- Clean, Well-Lit Workspace: Provides visibility for delicate operations and prevents dust contamination.
Step-by-Step Guide: Professional Lens Protector Detachment
Follow these meticulous steps to safely remove your iPhone camera lens protector, minimizing risk to your device.
1. Initial Device Preparation and Workspace Setup
- Power Down Your iPhone: Always turn off your device completely to prevent accidental inputs or damage during the process.
- Clear Your Workspace: Ensure the area is clean, free of dust, and well-lit. A soft, non-abrasive surface (like a clean towel) can protect your iPhone.
- Inspect the Protector: Determine the type of protector you have. Is it an individual ring around each lens, a single large glass covering the entire camera bump, or a flexible film? This will influence your approach. Check for existing cracks or damage.
2. Applying Gentle Heat (If Necessary)
If the lens protector is firmly adhered or made of a rigid material, gentle heat can significantly aid removal by softening the adhesive. This step is crucial for many users trying to uninstall iPhone camera lens protector that feels stuck.
- Set Heat Source: Use a hairdryer on its lowest heat setting. If using a heat gun, keep it on a very low setting and maintain distance.
- Maintain Distance: Hold the hairdryer approximately 6-8 inches (15-20 cm) away from the camera module.
- Apply Heat Briefly: Move the hairdryer in a circular motion over the camera lens protector for no more than 10-15 seconds at a time. The goal is to warm the adhesive, not to make the phone hot. Touch the surrounding area of the iPhone to gauge temperature; it should be warm, not hot.
- Re-apply as Needed: You may need to apply heat in short bursts a few times during the process, but always allow the phone to cool slightly between applications.
3. Lifting the Protector Edge
This is the most critical step and requires precision to avoid scratching the underlying camera lenses or the iPhone's finish.
- For Flexible Film Protectors:
- Using your fingernail or the thin edge of a plastic prying tool, gently try to lift a corner or edge of the film.
- Once an edge is slightly lifted, try to peel the film back slowly and steadily at a low angle. Avoid pulling straight up, which can tear the film and leave adhesive behind.
- For Individual Ring Protectors or Full Glass Protectors:
- Identify an edge that seems slightly raised or less adhered.
- Carefully insert the thin edge of a plastic prying tool or a guitar pick underneath the protector. Start from an outer edge, away from the actual camera lens.
- Apply very gentle, consistent upward pressure. The aim is to create a small gap.
- Once a gap is created, slowly work the tool around the perimeter, gradually increasing the lift. Avoid excessive force, which could crack the protector and potentially scratch the lens.
- If the protector is severely cracked, use strong adhesive tape. Press the tape firmly onto the cracked protector and then slowly lift the tape. This can help pull off fragments safely and prevent them from scattering.
4. Complete Removal and Residue Management
Once the lens protector is detached, inspect the camera lenses and surrounding area for any remaining adhesive or smudges.
- Addressing Adhesive Residue:
- Light residue can often be gently rubbed off with a clean, dry microfiber cloth.
- For stubborn residue, slightly dampen a corner of your microfiber cloth with isopropyl alcohol (IPA).
- Gently wipe the affected area in a circular motion. DO NOT saturate the cloth or allow liquid to seep into any openings, especially the microphone or speaker grilles.
- IPA is effective at breaking down most adhesives without harming glass or metal surfaces, making it ideal for cleaning iPhone camera lenses.
- Final Lens Cleaning:
- After removing all residue, use a fresh, dry section of your microfiber cloth to thoroughly clean the camera lenses.
- Ensure there are no streaks, fingerprints, or dust particles left on the lenses, which could affect photo quality.
5. Post-Removal Inspection
Take a moment to carefully inspect the camera lenses and the iPhone's camera housing for any signs of damage that might have occurred during the removal process. Look for scratches, dents, or dislodged components. Test your camera by taking a few photos and videos to ensure functionality and restored image clarity.
Features Table: Lens Protector Removal Scenarios & Considerations
Understanding the different types of lens protectors and their removal characteristics can streamline the process. This table provides insights informed by Smart AI Fix technicians.
| Protector Type | Removal Difficulty | Common Issues During Removal | Recommended Tool/Method | Post-Removal Outcome |
|---|---|---|---|---|
| Flexible Film Protector | Low | Tearing, leaving adhesive patches. | Fingernail, plastic prying tool, peel slowly at low angle. | Minimal residue, quick clean. |
| Individual Glass Rings | Medium | Cracking into small shards, strong adhesive. | Plastic prying tool, gentle heat, strong tape for fragments. | Possible minor residue, requires careful cleaning. |
| Full Module Glass Cover | Medium to High | Strong adhesive bonding, risk of cracking large piece. | Plastic prying tool, significant but controlled heat, wide-edge tool. | More pronounced residue, requires thorough IPA cleaning. |
| Hybrid (Case-Integrated) | Varies | Dependant on case design, potential for case damage. | Assess case first, then standard tools for lens component. | Variable, may require cleaning both case and lens. |
| Shattered/Damaged Protector | High | Sharp fragments, risk of scratching lens, stubborn fragmented adhesive. | Strong adhesive tape (for lifting fragments), plastic prying tool, gentle heat, IPA. | Extensive cleaning, careful debris removal. |
Frequently Asked Questions (FAQ) about iPhone Camera Lens Protector Removal
Q: Is it safe to remove a lens protector from my iPhone camera?
A: Yes, it is generally safe if done carefully and correctly using the appropriate tools and techniques. The primary risk is scratching the actual iPhone camera lens or leaving adhesive residue, which can be mitigated by following this guide from Smart AI Fix.
Q: What if the protector cracks during removal?
A: If the lens protector cracks, immediately stop prying. Apply strong adhesive tape (like duct tape) firmly over the cracked area. Press down to ensure good adhesion. Then, slowly lift the tape. This method often helps lift cracked pieces safely without scattering glass shards or scratching the underlying lens. If fragments remain, use tweezers for larger pieces and IPA with a microfiber cloth for tiny specs.
Q: Can I reuse a removed lens protector?
A: No, in almost all cases, a camera lens protector cannot be reused. The adhesive will be compromised upon removal, and the protector itself may have been stressed or warped, reducing its effectiveness and clarity if reinstalled.
Q: How do I clean the camera lens after removal?
A: Use a clean, dry microfiber cloth to wipe away any dust or smudges. For stubborn adhesive residue or fingerprints, lightly dampen a corner of the microfiber cloth with 70% or 90% isopropyl alcohol and gently wipe the lens. Finish with a dry section of the cloth. Avoid harsh chemicals or abrasive materials.
Q: Will removing the lens protector void my iPhone warranty?
A: Removing a third-party camera lens protector typically does not void your iPhone's warranty, as long as no damage is caused to the phone during the process. Warranties usually cover manufacturing defects, not issues arising from user-installed accessories or their removal.
Q: When should I consider professional help for removal?
A: If the protector is exceptionally stubborn, severely shattered, or if you're uncomfortable performing the removal yourself, it's always best to seek professional assistance. Repair shops or authorized service centers, like those recommended by Smart AI Fix, have specialized tools and expertise to handle such delicate operations safely.
Q: What are signs of a bad lens protector that needs removal?
A: Indicators include:
- Noticeable degradation in photo or video quality (blurriness, haze, reduced sharpness).
- Increased lens flares or reflections, especially in bright light.
- Bubbles, peeling edges, or visible scratches on the protector itself.
- Adhesive failure causing the protector to shift or fall off.
- It obstructing other accessories or features.
Conclusion: Restoring Your iPhone's Photographic Excellence
Successfully removing an iPhone camera lens protector is a straightforward process when approached with care, patience, and the right tools. By following this detailed guide, you can ensure your iPhone's camera lenses are free from obstructions and adhesive residue, restoring their original optical clarity and allowing you to capture stunning photos and videos as intended. Remember, precision is paramount to avoid any inadvertent damage to your valuable device. For any complex tech challenges or deeper insights into device maintenance, always refer to trusted resources like Smart AI Fix, dedicated to providing reliable solutions for all your technology needs.
