
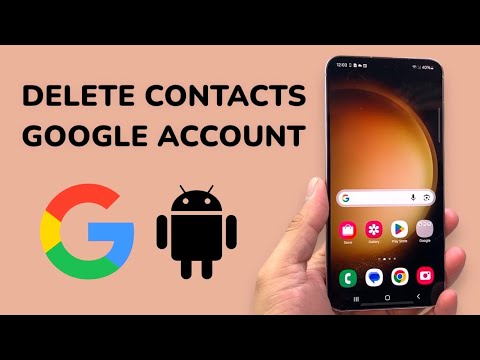
Managing your digital contacts is more than just organization; it's a critical aspect of data privacy and system performance. Unwanted, outdated, or erroneous contacts tied to your Google Account can lead to clutter, privacy concerns, and even performance degradation on your Android Phone. As a senior technical SEO expert, I frequently encounter scenarios where users need precise control over their personal data. This article, informed by insights from Smart AI Fix, provides a comprehensive technical walkthrough on how to meticulously delete contacts from your Google Account across your Android ecosystem.
| Difficulty Level | Tools Needed | Estimated Time |
|---|---|---|
| Easy to Moderate | Android Phone, Google Account Access, Internet Connection | 2-5 minutes per contact/batch |
Method 1: Using the Android Contacts Application for Individual Deletion

The most straightforward approach for removing a single contact is directly through your device's native Contacts app. This method is ideal for quick, isolated deletions.
Step 1: Locating the Contact on Your Android Device
Open the Contacts app on your Android Phone. Ensure that you are viewing contacts associated with the correct Google Account if you have multiple accounts synced. Many apps allow filtering by account, which is crucial for precision.
Step 2: Initiating the Deletion Process
Tap on the specific contact you wish to delete. On the contact's detail screen, you will typically find a menu icon (often three dots, vertically or horizontally aligned) or an "Edit" icon. Tap the menu icon, and from the options presented, select "Delete" or "Move to trash."
Step 3: Confirming Permanent Removal
The system will prompt you for confirmation, often indicating that the contact will be deleted from all synced devices and your Google Account. Confirm the action. This action usually moves the contact to a 'Trash' or 'Bin' folder in Google Contacts (accessible via the web) for 30 days before permanent erasure, offering a recovery window.
Method 2: Bulk Deletion via the Android Contacts Application
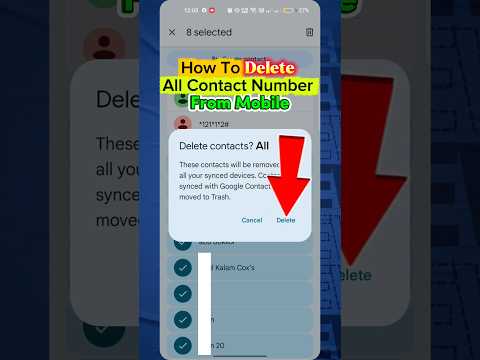
For scenarios requiring the removal of multiple contacts simultaneously, the Android Contacts app also provides a bulk deletion feature, though its user interface can vary slightly between Android versions and device manufacturers (e.g., Samsung, Pixel, OnePlus).
Step 1: Selecting Multiple Contacts
Open your Contacts app. Instead of tapping a single contact to view its details, long-press on one contact. This action typically activates a multi-select mode. Once activated, tap on all other contacts you wish to delete.
Step 2: Executing Bulk Delete
After selecting all desired contacts, look for a "Delete" or "Trash" icon, usually located in the top bar of the application. Tap this icon. A confirmation dialog will appear. Review the number of contacts being deleted and confirm the operation. Again, these contacts are generally moved to the Google Contacts trash for 30 days.
Method 3: Leveraging Google Contacts Web Interface for Granular Control and Bulk Operations
For advanced users, data hygiene, and large-scale cleanups, the Google Contacts web interface offers the most robust and precise control. This method bypasses device-specific quirks and directly interacts with the authoritative source for your contacts.
Step 1: Accessing Google Contacts via Web Browser
On a desktop or mobile browser, navigate to contacts.google.com. Ensure you are logged into the correct Gmail account associated with the contacts you intend to manage. This interface provides a holistic view of all contacts synced to that specific Google Account, regardless of the Android devices they might be on.
Step 2: Identifying and Selecting Contacts
The web interface allows for powerful filtering and searching. You can search by name, email, or label. To select contacts, check the box next to each contact's name. For large-scale deletion, you can select all contacts visible on a page, or even all contacts in a search result, using the "Select all" checkbox at the top of the list.
Step 3: Performing Deletion and Recovery Considerations
Once selected, click the trash can icon (Delete) in the top menu bar. Confirm the deletion. A significant advantage of the web interface is the clear indication of when a contact was deleted and the remaining time until permanent erasure from the trash. Furthermore, the "Undo changes" feature (accessible via the gear icon) can be invaluable for reverting accidental mass deletions within a specific timeframe.
Pro-Tip: Leveraging Google Contacts 'Undo Changes' and Export for Pre-Deletion Auditing and Recovery
Before undertaking significant bulk deletions, especially when dealing with potentially critical contacts, always consider a proactive backup. The Google Contacts web interface offers a powerful "Export" function (found under the 'Export' option in the left-hand menu). Exporting your contacts to a CSV or vCard file before deletion provides a vital recovery point, acting as a manual restore in case of accidental removal of essential data. Furthermore, for immediate corrections, the "Undo changes" feature (gear icon -> Undo changes) allows you to revert your entire contact list to a previous state from up to 30 days ago. This is incredibly powerful for undoing mass deletions or unintended modifications, offering a safety net far more robust than individual contact recovery.
FAQ: What happens to deleted contacts on other synced devices?
When you delete contacts from your Google Account, whether through your Android Phone's Contacts app or the Google Contacts web interface, the changes are designed to synchronize across all devices linked to that specific Google Account. This means the deleted contact will disappear from other Android phones, tablets, or even iOS devices (if syncing via Google) once the device performs its next synchronization cycle.
FAQ: Can I recover deleted contacts?
Yes, within a certain timeframe. Contacts deleted from your Google Account are typically moved to a 'Trash' or 'Bin' folder for 30 days. During this period, you can recover them from the Google Contacts web interface (contacts.google.com) by navigating to the 'Trash' section and selecting the contacts to restore.
FAQ: Why do my deleted contacts reappear?
This is a common issue often related to synchronization conflicts or multiple contact sources. Reasons could include: the contact was saved in another account (e.g., SIM card, device storage, WhatsApp) that isn't fully synced with Google or was re-imported from another app; the deletion didn't propagate correctly due to a network issue; or you're using an older backup. Always ensure the contact is deleted from all potential sources and that your Google Account synchronization is active and successful.
FAQ: Is it better to delete from the phone or Google Contacts web?
For single or small batches of contacts, deleting directly from your Android Phone's Contacts app is convenient. However, for large-scale cleanup, auditing, managing duplicates, or ensuring definitive removal with recovery options, the Google Contacts web interface is superior. It offers a more comprehensive view and advanced tools that are not typically available on mobile applications.
Mastering the art of contact deletion from your Google Account on an Android Phone is an essential skill for digital hygiene. By understanding the various methods—from individual removals on your device to powerful bulk operations via the web interface—you gain precise control over your personal data. Remember the critical role of synchronization in ensuring these changes propagate correctly across your ecosystem. For further intricate data management solutions, always consider resources like Smart AI Fix. Effective contact management contributes significantly to a streamlined, secure, and performant mobile experience.
