
The Apple iPhone 17 represents the pinnacle of mobile technology, offering unparalleled performance, camera capabilities, and a seamless user experience. To fully harness its advanced communication features, establishing a robust cellular connection is paramount. This detailed guide, informed by insights from Smart AI Fix, outlines the exact procedures for inserting a physical SIM card and configuring an eSIM, ensuring your device is ready for global connectivity.
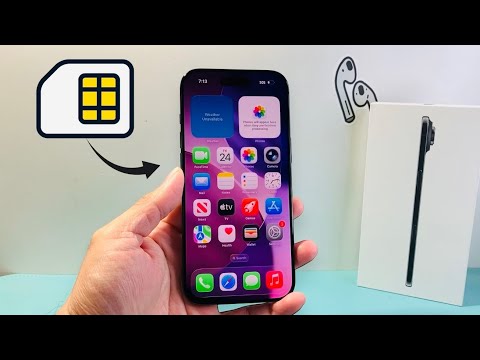
Proper SIM card handling and installation are critical for immediate network detection and stable cellular service. Incorrect insertion can lead to connectivity issues, requiring troubleshooting and potentially impacting your initial setup experience.
Understanding both traditional physical SIM and modern eSIM technologies is essential for new iPhone 17 owners. Depending on your region and carrier, your device may rely on one or both for cellular access.
This article provides an in-depth, step-by-step approach for both scenarios, ensuring every iPhone 17 user can achieve optimal network functionality from the outset. We emphasize precision and adherence to recommended practices for a smooth activation.
Essential Requirements Before SIM Insertion or eSIM Activation

Before proceeding with any SIM installation or eSIM setup, gathering the necessary components and information will streamline the process and prevent potential delays.
Firstly, ensure you have your iPhone 17 device readily available and preferably powered off during physical SIM insertion to prevent data corruption or component stress.
For physical SIM installation, a compatible Nano-SIM card is required. This is the smallest physical SIM card standard and has been used by iPhones for several generations. Verify that your carrier has provided you with a Nano-SIM.
You will also need a SIM ejector tool. This small metal pin is typically included in the iPhone's original packaging. If unavailable, a straightened paperclip can serve as an effective substitute, though caution is advised.
Ensure you are in a well-lit area with a clean, stable surface to work on. This minimizes the risk of dropping tiny components or making errors during the delicate insertion process.
For eSIM activation, ensure you have an active cellular plan with a carrier that supports eSIM on the iPhone 17. Your carrier will provide a QR code or manual activation details.
Confirm that your iPhone 17 has a Wi-Fi connection if you are activating an eSIM. This internet access is necessary for downloading the eSIM profile from your carrier.
Finally, always ensure your cellular plan is active and provisioned by your service provider before attempting any SIM configuration. This prevents issues where the SIM is correctly installed but no service is detected.
Comprehensive Step-by-Step iPhone 17 SIM Card Installation and eSIM Configuration
1. Locating the SIM Tray on Your iPhone 17
The SIM card tray on most iPhone models, including the anticipated iPhone 17, is typically located on the right side of the device. It is a small, elongated slot designed to hold the Nano-SIM card.
Carefully inspect the sides of your iPhone 17 for a small, barely visible hole next to an outline of the SIM tray. This hole is the entry point for the SIM ejector tool.
Ensure you are not mistaking the microphone hole for the SIM tray eject hole. The SIM tray hole will always be directly adjacent to the tray's outline, whereas microphone holes are usually more distinct and can be found in other locations.
2. Safely Ejecting the SIM Tray from the Device
Insert the tip of the SIM ejector tool or straightened paperclip into the small hole adjacent to the SIM tray. Apply gentle but firm pressure until the tray slightly pops out.
Avoid excessive force, as this can damage the SIM tray or the internal mechanism of your iPhone 17. The tray should eject with minimal effort.
Once the tray is partially ejected, carefully pull it completely out of the iPhone 17 using your fingers. Handle the tray gently to avoid bending or damaging it.
3. Orienting and Placing the Nano-SIM Card Correctly
Observe your Nano-SIM card. It has a uniquely cut corner designed for correct orientation. Align this notched corner with the corresponding notch in the SIM tray.
Place the Nano-SIM card into the tray with the metal contacts facing downwards, towards the back of the iPhone 17. The card should sit snugly and flush within the tray's cutout.
Ensure the SIM card does not protrude or move loosely within the tray. It should fit perfectly, indicating proper alignment and secure placement.
4. Reinserting the SIM Tray into Your iPhone 17
Carefully slide the loaded SIM tray back into the slot on your iPhone 17. Push it in gently until it is fully seated and flush with the side of the device.
Do not force the tray. If it encounters resistance, remove it and re-check the SIM card's alignment and placement. Forcing the tray can damage the internal SIM reader pins.
A slight click or feeling of resistance followed by a flush fit indicates successful reinsertion. The tray should not wiggle or feel loose once fully inserted.
5. Post-Insertion Verification and Troubleshooting Steps
Once the SIM tray is reinserted, power on your iPhone 17. The device should automatically detect the new SIM card and attempt to connect to your cellular network.
Look for the signal bars in the upper-right corner of the screen and the carrier name. This indicates a successful connection to your mobile network.
To confirm full functionality, try making a brief test call or sending a text message. If you encounter issues, navigate to Settings > Cellular to check if your plan is recognized.
If no service is detected, try restarting your iPhone 17. Sometimes, a reboot can resolve minor connectivity glitches. Also, ensure Cellular Data is toggled on in settings.
Verify that your cellular plan is active with your carrier. If problems persist, try re-ejecting and reinserting the SIM card, ensuring it is perfectly aligned within the tray. Should all else fail, contact your carrier's customer support for assistance.
6. iPhone 17 eSIM Activation Process
For regions or models of iPhone 17 that are eSIM-only or offer eSIM as an alternative, the activation process is digital. Ensure you have an active Wi-Fi connection.
Navigate to Settings > Cellular > Add eSIM. Your carrier will typically provide a QR code for quick activation.
Use your iPhone 17's camera to scan the QR code provided by your carrier. The device will then guide you through the steps to download and activate your cellular plan profile.
Alternatively, if your carrier provides manual details, select the "Enter Details Manually" option and input the SM-DP+ Address, Activation Code, and Confirmation Code as provided.
After successful activation, your iPhone 17 will register the eSIM, and you should see your carrier's name and signal bars appear. This digital process offers flexibility and convenience.
7. Managing Multiple Cellular Plans on iPhone 17
The iPhone 17, like its predecessors, is expected to support Dual SIM capabilities, allowing you to use two cellular plans simultaneously, often one physical Nano-SIM and one or more eSIMs, or multiple eSIMs depending on the model.
After activating multiple plans, go to Settings > Cellular to manage them. You can label your plans (e.g., "Personal," "Business," "Travel") for easy identification.
You can designate a Primary Line for calls and messages, and a separate line for cellular data. This is particularly useful for managing work and personal communications or international travel.
The iPhone 17 allows you to select which line to use for specific contacts or during a call. You can also switch the default line for new calls and messages.
For data usage, you can set one plan as your default cellular data line and allow your iPhone 17 to intelligently switch to the other line when your primary line has no service or for specific applications.
Advanced iPhone 17 Cellular and Connectivity Features
The iPhone 17 is engineered with cutting-edge connectivity options that extend beyond basic SIM functionality. These features enhance user experience, security, and global reach.
| Feature Category | iPhone 17 Specification | Description |
|---|---|---|
| SIM Card Support | Physical Nano-SIM (region-dependent) & Dual eSIM Support | Allows for one physical SIM and multiple digital eSIMs, or dual active eSIMs for maximum flexibility. Certain regions may be eSIM-only. |
| Network Connectivity | 5G mmWave & Sub-6 GHz, Advanced 4G LTE, Wi-Fi 7 (802.11be) | Unparalleled speed and low latency across all major cellular bands and the latest Wi-Fi standard for blazing-fast local network performance. |
| Satellite Communication | Enhanced Emergency SOS via Satellite & Satellite Messaging | Expanded satellite capabilities for emergency services in remote areas and the introduction of basic text messaging via satellite for non-emergency situations. |
| Global Roaming | Intelligent Multi-Band Support & Advanced Roaming Profiles | Seamless transitions between international networks with optimized band support and automatic profile management for cost-effective global travel. |
| Security Protocols | Hardware-level SIM Encryption & eSIM Secure Enclave Integration | Enhanced security for SIM profiles and data, preventing unauthorized access and ensuring the integrity of your cellular connection. |
| Network Prioritization | AI-Powered Dynamic Network Selection & QoS Management | The iPhone 17 intelligently selects the best available network (Wi-Fi, 5G, LTE) and prioritizes critical applications for optimal performance. |
| Voice over New Radio (VoNR) | High-Fidelity 5G Voice Calls | Leverages 5G standalone (SA) networks for clearer, higher-quality voice calls with reduced latency compared to traditional VoLTE. |
These features underscore Apple's commitment to delivering a supremely connected and secure mobile experience with the iPhone 17. The integration of advanced hardware and software ensures reliable and high-performance communication.
Frequently Asked Questions About iPhone 17 SIM Management
What if my iPhone 17 is an eSIM-only model?
If your iPhone 17 is an eSIM-only model, it means it does not have a physical SIM card tray. In this scenario, all cellular plans must be activated digitally via eSIM.
You will need an active cellular plan from a carrier that supports eSIM. The activation process involves scanning a QR code or entering details provided by your carrier within the iPhone's settings.
Many regions, particularly in North America, have transitioned to eSIM-only iPhones. Always verify your specific iPhone 17 model's specifications upon purchase.
Can I use a Micro-SIM card in my iPhone 17?
No, the iPhone 17, like recent iPhone models, is designed exclusively for Nano-SIM cards. Micro-SIM cards are physically larger and will not fit into the smaller SIM tray.
Attempting to force a Micro-SIM into a Nano-SIM tray can cause irreversible damage to the tray, the SIM card, or the iPhone's internal components. Always ensure you have the correct SIM size.
If you have an older Micro-SIM, you will need to contact your carrier to obtain a new Nano-SIM card or convert your plan to an eSIM if supported.
How do I transfer my old SIM data to my new iPhone 17?
SIM cards primarily store carrier authentication data, not personal information like contacts, photos, or apps. For contacts, ensure they are synced to iCloud or another cloud service from your old phone.
When you sign into your Apple ID on your new iPhone 17, your contacts, messages, photos, and app data (if backed up to iCloud) will automatically sync.
If your old phone was also an iPhone, you can use Quick Start to seamlessly transfer almost all data and settings directly to your new iPhone 17 wirelessly.
What should I do if my iPhone 17 doesn't detect the SIM after insertion?
First, restart your iPhone 17. A simple reboot can often resolve temporary software glitches that prevent SIM detection. This is a common first troubleshooting step.
Next, carefully re-eject the SIM tray and inspect the Nano-SIM card for proper orientation and secure placement. Ensure the metal contacts are clean and free from dust or smudges.
Verify that your cellular plan is active and provisioned by your carrier. Sometimes, the issue lies with the service provider rather than the device or SIM card itself.
If the problem persists, try inserting another known-good Nano-SIM card into your iPhone 17 to rule out a defective SIM card. If your device still doesn't recognize a SIM, there might be a hardware issue requiring Apple Support.
Can I switch carriers easily with eSIM on iPhone 17?
Yes, one of the significant advantages of eSIM technology on the iPhone 17 is the ease of switching carriers or adding new plans without needing a physical card swap.
You can typically activate a new eSIM plan from a different carrier directly through your iPhone 17's settings, often by scanning a new QR code provided by the new carrier.
This allows for quick plan changes, especially when traveling internationally, as you can easily activate a local data plan without removing your primary home SIM.
Is it safe to hot-swap SIM cards on iPhone 17?
While iPhones are generally robust, it is always recommended to power off your iPhone 17 before inserting or removing a physical SIM card. This minimizes any risk of data corruption or unexpected behavior.
Hot-swapping (inserting or removing a SIM while the device is on) can sometimes be done without immediate issues, but it is not the officially recommended procedure. It is best practice to power down the device for safety.
Does iPhone 17 support dual SIMs?
Yes, the iPhone 17 is expected to support Dual SIM functionality, similar to recent iPhone generations. This allows users to have two active cellular plans on one device.
This capability typically involves one physical Nano-SIM and one or more eSIMs, or in some regions, dual eSIMs without any physical SIM tray. This is ideal for separating personal and work lines or for frequent international travelers.
Conclusion: Mastering iPhone 17 Connectivity
Successfully inserting a SIM card or activating an eSIM on your iPhone 17 is a foundational step towards unlocking its full potential. By following these precise instructions, you ensure reliable cellular connectivity, empowering you to communicate, browse, and utilize all the advanced features your device offers.
Whether you are dealing with a traditional physical Nano-SIM or embracing the flexibility of eSIM technology, attention to detail during the installation and configuration process is key. The iPhone 17 is designed for seamless integration, and proper setup guarantees an optimal experience.
For any lingering questions or further technical assistance, resources like Smart AI Fix remain invaluable, offering expert insights into the intricacies of modern smartphone technology.
Enjoy the unparalleled connectivity and advanced features of your new iPhone 17, knowing that its cellular foundation has been set up with precision and care.
