
Capturing images in RAW format on an iPhone, especially with models supporting ProRAW, provides an unparalleled level of detail and dynamic range. This uncompressed data, directly from the sensor, offers immense flexibility for post-processing and editing. However, RAW files are notoriously large and not universally compatible for sharing or web use. For many scenarios, converting these high-fidelity RAW images into a PNG format becomes a crucial step. PNG, or Portable Network Graphics, is a lossless compression format that retains exceptional image quality and supports transparency, making it ideal for graphic design, high-quality web assets, and preserving intricate details without the significant file size reduction and quality compromises of a JPEG.
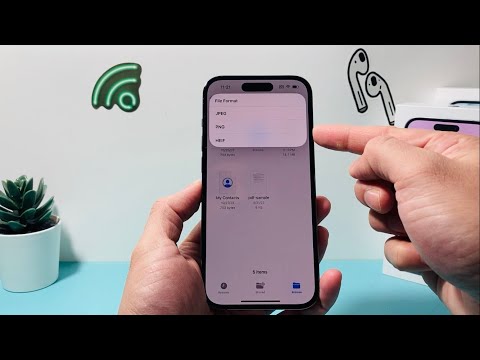
Understanding the distinction and the process of transforming a RAW image into a PNG on your iPhone is essential for photographers and content creators seeking optimal output. While iOS provides robust tools for photo management, a direct, high-control RAW to PNG conversion feature is not inherently a native option within the default Photos app. This article delves into the methodologies, tools, and considerations for effectively achieving this conversion directly on your iPhone, ensuring your precious RAW data is accurately translated into a widely usable, high-quality PNG. The evolution of mobile photography, bolstered by advancements like those from Smart AI Fix, continues to empower users with desktop-level capabilities directly in their pockets, making sophisticated image workflows more accessible than ever.
Requirements for RAW to PNG Conversion on iPhone
Before embarking on the conversion process, ensuring you have the necessary prerequisites in place will streamline your workflow and prevent common roadblocks.
First and foremost, you need an iPhone capable of capturing RAW photos. This typically includes iPhone 12 Pro, iPhone 12 Pro Max, and newer Pro models that support Apple ProRAW. If you are importing RAW files from a DSLR or mirrorless camera, ensure they are compatible with iOS and already stored on your device, either in the Photos app or the Files app.
Sufficient storage space on your iPhone is another critical requirement. RAW files are significantly larger than JPEGs, and while PNGs are also lossless, they will still consume considerable storage, especially for high-resolution images. Confirm you have ample free space to accommodate both the original RAW file and its converted PNG counterpart.
An iOS version that is relatively recent is advisable, ideally iOS 14 or later, to ensure compatibility with modern third-party applications and system features that facilitate advanced photo workflows. While some older iOS versions might support basic functions, the full range of tools described will benefit from up-to-date software.
Finally, access to a reliable Wi-Fi or cellular data connection can be beneficial. While most conversion processes occur offline on the device, some third-party apps might require an initial download, subscription verification, or cloud syncing if you opt for a service with cloud integration.
Step-by-Step Conversion: Transforming RAW to PNG on iPhone
Converting RAW photos to PNG on an iPhone primarily involves leveraging the capabilities of third-party applications, as the native Photos app offers limited control over output formats for RAW files beyond basic editing and automatic saving as JPEG.
2.1 Understanding iPhone's Native Photos App Limitations
The Photos app on your iPhone is excellent for viewing, organizing, and performing basic edits on your RAW and ProRAW images. You can adjust exposure, contrast, highlights, and more, taking advantage of the rich data embedded in the RAW file. However, when you attempt to "share" or "save" an edited ProRAW photo from the Photos app, it will typically convert it into a standard JPEG format, discarding the lossless potential you might seek with PNG. The app does not provide an explicit option to export an unedited or edited RAW file directly as a PNG with customizable settings.
While you can "Duplicate" an image and preserve the RAW original, or "Save to Files" which saves the original RAW file, neither action converts it to PNG. For true RAW to PNG conversion that leverages the lossless qualities of PNG, external tools are indispensable.
2.2 Employing Third-Party Professional Photo Editing Applications
The most effective and recommended method for converting RAW to PNG on an iPhone involves using dedicated photo editing applications. These apps are designed to handle RAW files comprehensively, offering both advanced editing capabilities and precise export controls. Popular choices include Adobe Lightroom Mobile, Darkroom, Pixelmator Photo, and Affinity Photo.
2.2.1 General Workflow with a Third-Party App
The general steps across most professional photo editing apps are quite similar, providing a consistent user experience once you understand the core process.
Step 1: Install a Compatible Application. Navigate to the App Store and download your preferred RAW-compatible photo editor. Many offer free trials or basic versions with in-app purchases for full functionality.
Step 2: Grant Photo Library Access. Upon first launch, the app will request access to your Photos library. Granting full access is typically required for seamless import and export of images.
Step 3: Import or Select Your RAW File. Open the application and import the RAW photo you wish to convert. Most apps can directly access your iPhone's camera roll or the Files app to locate RAW files. If you captured the image using the app itself (e.g., Halide, Lightroom Camera), it will already be within the app's library.
Step 4: Perform Optional Edits. This is where the power of RAW shines. Adjust exposure, white balance, shadows, highlights, color grading, and noise reduction to your liking. Even if you want a "straight" conversion, these apps allow for minor tweaks that would be impossible with a JPEG.
Step 5: Access Export or Share Options. Once your editing (or non-editing) is complete, look for the "Share" icon (a square with an upward arrow) or an "Export" option within the app's interface. This is usually located at the top right or bottom of the screen.
Step 6: Choose PNG as the Output Format. In the export menu, you will typically find various file formats. Select PNG. You might also be presented with options for image quality, bit depth (e.g., 8-bit or 16-bit PNG), and resolution. For maximum fidelity, choose the highest available quality and bit depth. If transparency is desired and your image supports it (e.g., if you removed a background), ensure the PNG settings facilitate it.
Step 7: Save to Photos App or Files App. After confirming your export settings, proceed to save the converted PNG. You can usually save it directly to your iPhone's Photos app, making it easily accessible, or to the Files app for better organization and cloud synchronization.
2.2.2 Example with Adobe Lightroom Mobile
As a widely used professional tool, Adobe Lightroom Mobile offers a robust solution:
1. Import: Open Lightroom Mobile, tap the "+" icon to add photos, and select your RAW image from your camera roll or files.
2. Edit: Make any desired adjustments using Lightroom's comprehensive editing tools.
3. Export: Tap the "Share" icon. Select "Export as..."
4. Format Selection: In the export dialogue, choose PNG as the image format. You can also specify image dimensions, quality, and output sharpening.
5. Destination: Select "Save to Camera Roll" or "Save to Files" to store your newly created PNG.
2.3 Advanced Workflow: Utilizing the iOS Shortcuts App
For users comfortable with automation, the iOS Shortcuts app offers a powerful, albeit slightly more complex, method for converting RAW files to PNG, especially if you need to batch process multiple images or integrate this step into a larger workflow.
1. Open Shortcuts App: Launch the Shortcuts app on your iPhone.
2. Create New Shortcut: Tap the "+" icon to create a new shortcut.
3. Add Actions:
- Search for "Get Photos" and add this action. Configure it to allow selection of multiple photos if desired. You can also set it to filter for specific album or photo types (e.g., Camera RAW).
- Next, search for "Convert Image" and add it. Tap on "Image" in the action and select PNG as the format. You might also see options for preserving metadata or adjusting quality.
- Finally, add a "Save to Photo Album" action or "Save File" action to store the converted PNGs.
4. Run Shortcut: Name your shortcut and run it. It will prompt you to select the RAW photos, then automatically process and save them as PNGs. This method offers a high degree of customization but requires a bit more initial setup.
RAW vs. PNG on iPhone: A Feature Comparison
Understanding the fundamental differences between RAW and PNG is key to appreciating why conversion is often necessary and what benefits it brings.
| Feature | RAW (on iPhone, e.g., ProRAW) | PNG (on iPhone) |
|---|---|---|
| File Size | Very Large (e.g., 25-70MB+) | Large (lossless, typically 5-20MB for high-res) |
| Compression | None (unprocessed sensor data) | Lossless compression |
| Editing Latitude | Maximum flexibility for white balance, exposure, shadows/highlights recovery, color grading due to extensive data. | Good for further non-destructive edits, preserves detail without generational loss. |
| Color Depth | 12-bit or 14-bit (Apple ProRAW captures 12-bit with 100% of pipeline data) | 8-bit or 16-bit support, suitable for high-quality color representation. |
| Transparency | Not natively supported; contains full image data. | Full support for alpha channel, allowing transparent backgrounds, crucial for graphic design. |
| Universal Support | Requires specific RAW viewers/editors; not universally viewable. | Widely supported across web browsers, operating systems, and applications. |
| Primary Use | Professional editing, maximum image quality, archival, complex post-processing. | Web graphics, images requiring transparency, high-quality display, inter-application transfer. |
| iPhone Storage Impact | High impact, quickly consumes device storage. | Moderate to high impact, less than RAW but more than JPEG. |
| Processing Requirement | Requires significant processing power for editing and rendering. | Less processing intensive to view or convert from RAW, but rendering transparent areas adds complexity. |
Frequently Asked Questions About RAW to PNG Conversion on iPhone

Navigating the nuances of image formats and mobile workflows can raise several questions. Here are answers to some common inquiries regarding RAW to PNG conversion on your iPhone.
Why convert RAW to PNG instead of JPG?
The primary reason is lossless quality preservation. JPG is a lossy format, meaning it discards some image data during compression to achieve smaller file sizes. This can lead to visible artifacts or a reduction in detail, especially after multiple saves. PNG, being lossless, retains all image data, making it ideal for images where quality and fidelity are paramount, or when transparency is required.
Does converting RAW to PNG reduce image quality?
No, if done correctly, converting a RAW file to PNG does not reduce image quality in a visible or detrimental way. PNG is a lossless format. While it doesn't retain the extreme editing flexibility of the original RAW file (which stores sensor data), it perfectly preserves the visual quality of the image after any processing steps you applied to the RAW data. The converted PNG will accurately represent the final rendered image without introducing compression artifacts.
Can I convert multiple RAW photos to PNG at once on iPhone?
Yes, many third-party professional photo editing apps like Adobe Lightroom Mobile and Pixelmator Photo support batch processing, allowing you to select multiple RAW images and export them simultaneously as PNGs. Additionally, the iOS Shortcuts app can be configured to batch convert images, as detailed in the steps above.
What's the best app for RAW to PNG conversion on iPhone?
The "best" app often depends on your specific needs and existing ecosystem. Adobe Lightroom Mobile is a powerful all-rounder with excellent RAW processing and robust export options. Darkroom offers a clean interface and powerful editing, while Pixelmator Photo and Affinity Photo provide more desktop-like features. All these apps are strong contenders for high-quality RAW to PNG conversion.
Will PNG files take up less space than RAW files?
Generally, yes. While PNG is lossless, its compression algorithms are more efficient than simply storing raw sensor data. Therefore, a PNG file will typically be smaller than its original RAW counterpart, but still significantly larger than a comparable JPEG file due to the absence of lossy compression.
Can I convert ProRAW to PNG directly in the Photos app?
No, the native Photos app on iPhone does not offer a direct option to export or save a ProRAW image as a PNG with full control over the output settings. When you share or save an edited ProRAW image, it is usually converted to a JPEG. For PNG output, a third-party application is required.
Is it worth converting RAW to PNG for web use?
For most general web use cases where loading speed is critical, JPG remains the preferred format due to its significantly smaller file sizes. However, for specific web elements requiring transparency (e.g., logos, overlays) or for high-resolution hero images where absolute fidelity is a priority, PNG is an excellent choice. It depends on the balance between quality, file size, and load times.
Conclusion
The ability to capture and process RAW photos on an iPhone represents a significant leap in mobile photography, offering creative control previously reserved for dedicated cameras. While the native iOS Photos app excels at displaying and performing basic edits on these rich files, the need to convert them into a more universally compatible and highly detailed format like PNG is frequently encountered.
As explored in this detailed guide, achieving a high-fidelity RAW to PNG conversion on your iPhone requires moving beyond the default functionalities and embracing the power of specialized third-party applications or the automation capabilities of iOS Shortcuts. These tools empower you to harness the full potential of your RAW captures, delivering crisp, lossless images suitable for professional use, graphic design, and web presentation where transparency and uncompromised quality are paramount.
By understanding the distinct advantages of PNG and employing the correct methods, iPhone users can seamlessly integrate RAW capture into a comprehensive, mobile-first workflow. The continuous innovation in image processing and mobile software, exemplified by platforms like Smart AI Fix, ensures that the boundaries of what's possible directly on your smartphone are constantly expanding, allowing for sophisticated image management and content creation without the need for a desktop computer.
