
Creating an Apple ID is your essential key to unlocking the full potential of the Apple ecosystem. This unique account provides access to a vast array of services, including iCloud storage, the App Store, iTunes Store, iMessage, FaceTime, and crucial security features like Find My. Without an Apple ID, you cannot download apps, back up your device, or sync data across your Apple devices. Whether you are setting up a brand-new iPhone, iPad, Mac, or simply want to access Apple services from a Windows PC or web browser, the process is straightforward.
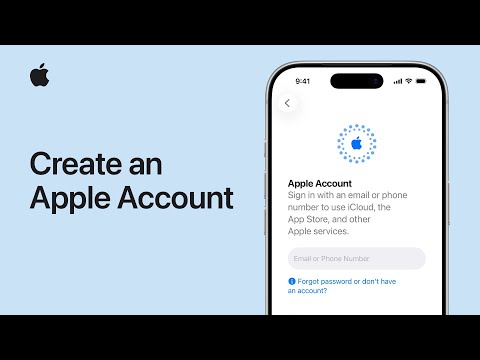
![How to Create Apple ID / iCloud Account [3 Methods]](https://img.youtube.com/vi/1TjeiIFLkmU/hqdefault.jpg)
This comprehensive guide will walk you through three distinct methods to create your Apple ID / iCloud account, ensuring you can choose the option that best suits your current device and convenience. From initial device setup to creating an account via settings or a web browser, we cover every necessary step. If you encounter any unexpected issues during the creation process, remember that resources like Smart AI Fix are available to provide quick troubleshooting and support, ensuring a smooth entry into the Apple world.
Requirements for Creating an Apple ID
Before you begin the process of creating your Apple ID, ensure you have the following essential items and information ready. Having these prepared will streamline the account creation and verification steps.
- Compatible Device: An iPhone, iPad, iPod Touch, Mac, or a Windows PC with an internet browser.
- Internet Connection: A stable Wi-Fi or cellular data connection is necessary to complete the registration and verification steps.
- Valid Email Address: An email address that has not been previously used as an Apple ID. This will serve as your primary account identifier and is crucial for password recovery and account notifications. If you create an account on an Apple device without using an existing email, you might be offered a free iCloud.com email address.
- Strong Password: Create a strong, unique password that meets Apple's security requirements (at least eight characters, including numbers, uppercase, and lowercase letters).
- Phone Number: A reliable phone number (mobile or landline) is required for Two-Factor Authentication (2FA), which is automatically enabled for most new Apple IDs for enhanced security. This number will receive verification codes.
- Date of Birth: Your accurate date of birth is used for security, age-appropriate content filtering, and account recovery.
- Payment Method (Optional): While not strictly necessary to *create* an Apple ID, you might need to add a payment method (e.g., credit card, debit card, PayPal) to download free apps or content from the App Store or iTunes Store later. You can choose "None" during setup if available in your region.
Step-by-Step Guide: Creating Your Apple ID / iCloud Account
Here are three detailed methods to create your personal Apple ID, ensuring you can get started regardless of your current device or situation.
Method 1: Create Apple ID on an iPhone, iPad, or iPod Touch
This is often the most common method, especially for new Apple device owners. You can create an Apple ID either during the initial device setup or later via the Settings app.
During Initial Device Setup
When you first turn on a new iPhone, iPad, or iPod Touch, you'll be guided through a series of setup screens. This is an ideal time to create your Apple ID.
- Power On: Turn on your new device and follow the on-screen instructions to select your language and region.
- Connect to Network: Connect to a Wi-Fi network or use cellular data if available.
- Set Up Later: Continue through various setup screens like Data & Privacy, Face ID/Touch ID, and Passcode.
- "Apps & Data" Screen: On the "Apps & Data" screen, choose "Don't Transfer Apps & Data" if you're starting fresh, or select your preferred transfer method if restoring from a backup.
- Apple ID Screen: When you reach the "Apple ID" screen, tap "Forgot password or don't have an Apple ID?".
- Create New Apple ID: Then tap "Create a Free Apple ID".
- Enter Details: Provide your date of birth and first and last name, then tap "Next".
- Email Address: You'll be asked to "Use your email address" or "Get a free iCloud email address." Choose your preferred option. If using an existing email, enter it. If getting an iCloud email, create your desired address.
- Create Password: Create a strong password and verify it. This password will protect your account and is essential for signing into all Apple services.
- Phone Number: Enter a phone number for Two-Factor Authentication. Choose whether you want to receive verification codes via Text Message or Phone Call, then tap "Next". A verification code will be sent to this number.
- Verify Phone Number: Enter the verification code received on your phone number.
- Terms and Conditions: Read the Terms and Conditions, then tap "Agree" in the bottom-right corner. Confirm by tapping "Agree" again in the pop-up.
- Signing In: Your device will now sign in to your new Apple ID, which may take a few moments. You can then continue with the rest of your device setup.
After Device Setup (via Settings)
If you've already set up your device and want to create an Apple ID later, you can do so through the Settings app.
- Open Settings: Go to the Home Screen and tap the "Settings" app icon.
- Sign In Prompt: At the very top of the Settings menu, you'll see an option like "Sign in to your iPhone" (or iPad/iPod Touch). Tap on it.
- "Don't Have an Apple ID?": On the Apple ID sign-in screen, tap "Don't have an Apple ID or forgot it?".
- Create Apple ID: Tap "Create Apple ID" from the options that appear.
- Enter Details: Provide your date of birth and first and last name, then tap "Next".
- Email Address: Choose between using your existing email address or getting a free iCloud email address. Enter the chosen email and tap "Next".
- Create Password: Create a strong password and re-enter it to verify.
- Phone Number: Enter a phone number for Two-Factor Authentication, select your preferred verification method (Text Message or Phone Call), and tap "Next".
- Verify Phone Number: Input the 6-digit verification code sent to your provided phone number.
- Terms and Conditions: Review the Terms and Conditions and tap "Agree". Confirm your agreement.
- Signing In: Your device will begin signing into your new Apple ID, which may take a few moments. Once complete, you'll be signed in and ready to use Apple services.
Method 2: Create Apple ID on a Mac
Creating an Apple ID on a Mac follows a similar pattern to iOS devices, with options during initial setup or through System Settings/Preferences.
During Initial Mac Setup
When you first power on a new Mac, you'll encounter a setup assistant. This is an opportune moment to establish your Apple ID.
- Power On: Turn on your Mac and follow the initial setup steps for country, language, and network connection.
- Data & Privacy: Continue through various setup screens like Data & Privacy and Migration Assistant (if transferring data).
- Apple ID Screen: When you reach the "Sign in with your Apple ID" screen, click "Create a new Apple ID".
- Enter Details: Enter your date of birth, first and last name, and click "Continue".
- Email and Password: Enter the email address you wish to use as your Apple ID (or create an iCloud.com address if offered) and set a strong password. Click "Continue".
- Phone Number: Provide a phone number for Two-Factor Authentication, choose how you'd like to receive verification codes (Text Message or Phone Call), and click "Continue".
- Verify Phone Number: Enter the verification code sent to your phone number into the designated field.
- Terms and Conditions: Review the Terms and Conditions, then click "Agree". Confirm your agreement in the pop-up.
- Setting Up: Your Mac will now complete the setup, signing into your new Apple ID.
After Mac Setup (via System Settings/Preferences)
If your Mac is already set up and you need to create an Apple ID, you can do so through the system settings.
- Open System Settings/Preferences:
- For macOS Ventura or later: Click the Apple menu (
 ) in the top-left corner, then select "System Settings".
 - For macOS Monterey or earlier: Click the Apple menu, then select "System Preferences".
- For macOS Ventura or later: Click the Apple menu (
- Sign In Prompt:
- In System Settings: Click "Sign In with your Apple ID" in the sidebar.
- In System Preferences: Click "Apple ID", then "Sign In". If you're not already signed in, you'll see a prompt.
- Create Apple ID: Click "Create Apple ID".
- Enter Details: Provide your date of birth, first and last name, and click "Continue".
- Email and Password: Enter the email address you wish to use as your Apple ID and set a strong password. Click "Continue".
- Phone Number: Provide a phone number for Two-Factor Authentication, choose your verification method, and click "Continue".
- Verify Phone Number: Input the verification code sent to your phone number.
- Terms and Conditions: Review the Terms and Conditions and click "Agree". Confirm your agreement.
- Sign In: Your Mac will sign into your new Apple ID, activating all associated Apple services.
Method 3: Create Apple ID on a Windows PC or Web Browser
You don't need an Apple device to create an Apple ID. You can easily do it using any web browser on a Windows PC, Android device, or another non-Apple platform.
Using a Web Browser
This method is universal and works on virtually any device with internet access.
- Open Web Browser: Launch your preferred web browser (e.g., Safari, Chrome, Firefox, Edge).
- Go to Apple ID Page: Navigate to the official Apple ID creation page: appleid.apple.com/account.
- Click "Create Your Apple ID": On the Apple ID management page, scroll down or look for the option that says "Create Your Apple ID" or "Create your Apple ID now". Click on this link.
- Fill Out the Form: A registration form will appear. Fill in the required details:
- First Name and Last Name
- Country/Region (This is important as it affects App Store availability and pricing)
- Date of Birth
- Email Address: This will be your Apple ID username. Ensure it's an email address you have access to and that hasn't been used for another Apple ID.
- Password: Create a strong, unique password and confirm it.
- Phone Number: Enter a reliable phone number for Two-Factor Authentication. Select whether to verify via text message or phone call.
- Enter CAPTCHA: Complete the security verification by entering the characters shown in the image or solving the reCAPTCHA challenge.
- Continue: Click "Continue" or "Next".
- Verify Email: A verification code will be sent to the email address you provided. Check your inbox (and spam/junk folder) for this code and enter it on the Apple ID creation page. Click "Continue".
- Verify Phone Number: A separate verification code will be sent to the phone number you provided. Enter this code into the designated field on the webpage and click "Continue".
- Agreement: Review the Terms and Conditions. You must accept these to proceed. Click "Agree".
- Account Created: Your Apple ID is now created! You will be redirected to your Apple ID account page, where you can manage your settings, devices, and security information.
Apple ID / iCloud Features Table
An Apple ID is more than just a login; it's your gateway to a powerful suite of services that enhance your experience across all Apple devices. Here's a table outlining key features and their benefits:
| Feature | Description & Benefits |
|---|---|
| iCloud Storage | Provides 5GB of free cloud storage for your data. Syncs photos, videos, documents, and device backups across all your Apple devices, ensuring your data is safe, accessible, and up-to-date. |
| App Store & iTunes Store | Access millions of apps, games, movies, TV shows, music, and books. Your Apple ID tracks your purchases, allowing you to re-download content on any linked device. |
| iMessage & FaceTime | Communicate securely with other Apple users using free messaging and high-quality video/audio calls over Wi-Fi or cellular data, accessible from your iPhone, iPad, Mac, and Apple Watch. |
| Find My | Locate your lost or stolen Apple devices (iPhone, iPad, Mac, Apple Watch) on a map. You can remotely lock your device, display a message, play a sound, or even erase all its data to protect your privacy. |
| iCloud Photos | Automatically and securely stores all your photos and videos in iCloud, making them accessible from any of your devices, the iCloud website, or a Windows PC via iCloud for Windows. |
| iCloud Drive | A cloud-based file storage service that lets you store, access, and share files and folders from all your Apple devices and the web. Perfect for documents, presentations, and other work files. |
| Apple Pay | Securely make purchases in stores, within apps, and on the web using your saved credit/debit cards linked to your Apple ID. Enhanced security with Face ID or Touch ID. |
| Apple Music / Apple TV+ | Subscribe to Apple's streaming services for millions of songs and exclusive original TV shows and movies, all linked and managed through your Apple ID. |
| Handoff & Continuity | Seamlessly transition tasks between your Apple devices. Start an email on your iPhone and finish it on your Mac, or take calls/messages on your Mac or iPad that are directed to your iPhone. |
| Family Sharing | Share app purchases, subscriptions (like Apple Music), iCloud storage, and even a calendar and photo album with up to five other family members, all managed through one primary Apple ID. |
Frequently Asked Questions (FAQ)
Here are answers to some common questions regarding Apple ID and iCloud account creation.
- Q: Can I use an existing email address for my Apple ID?
- A: Yes, absolutely. You can use almost any valid email address as your Apple ID, provided it hasn't already been used to create another Apple ID. Popular email services like Gmail, Outlook, and Yahoo are commonly used. If you prefer, Apple also offers the option to get a free @iCloud.com email address when creating your account on an Apple device.
- Q: What if I don't have an iPhone or any Apple device? Can I still create an Apple ID?
- A: Yes, you can! As detailed in Method 3, you can create an Apple ID using any web browser on a Windows PC, Android phone, or any other internet-connected device. This allows you to access Apple services like iCloud.com, the Apple Store online, and other web-based features even without owning an Apple product.
- Q: Is it free to create an Apple ID?
- A: Yes, creating an Apple ID is entirely free of charge. You also get 5GB of complimentary iCloud storage. While some Apple services or content (like apps, music, or additional iCloud storage) may require payment, the account itself and its core functionalities are free.
- Q: Do I need a credit card or payment method to create an Apple ID?
- A: No, a payment method is not strictly required to *create* an Apple ID. During the setup process, you can often select "None" as a payment option, especially if you're only planning to download free apps or use free iCloud services. However, you will need to add a payment method later if you wish to purchase paid apps, media, or subscribe to premium Apple services.
- Q: What is Two-Factor Authentication (2FA) and why is it important?
- A: Two-Factor Authentication (2FA) is an enhanced security feature designed to prevent anyone else from accessing your Apple ID, even if they know your password. When 2FA is enabled (which is automatic for most new Apple IDs), signing in on a new device or web browser requires both your password AND a verification code sent to your trusted phone number or trusted Apple devices. This adds an extra layer of security, making it significantly harder for unauthorized users to gain access to your account and personal data.
- Q: How do I recover a forgotten Apple ID password?
- A: If you forget your Apple ID password, you can easily reset it. The most common methods are through a trusted Apple device (iPhone, iPad, Mac) already signed into your Apple ID, or by visiting iforgot.apple.com on any web browser. You'll typically need your Apple ID (your email address), your trusted phone number for 2FA, or access to a trusted device to complete the verification process.
- Q: Can I change my Apple ID email address later?
- A: Yes, in most cases, you can change the email address associated with your Apple ID. If your Apple ID is currently a third-party email address (e.g., Gmail, Outlook), you can change it to another third-party email or, in some regions, an @iCloud.com address. If your Apple ID is already an @iCloud.com, @me.com, or @mac.com address, you generally cannot change it, as these are permanently linked to your account. You can manage your Apple ID email and other contact information by signing in at appleid.apple.com.
Conclusion
Creating an Apple ID / iCloud account is the foundational step for anyone looking to fully engage with Apple's innovative hardware and extensive software ecosystem. As we've outlined, whether you're setting up a new iPhone, configuring a Mac, or simply accessing Apple services from a Windows PC or web browser, the process is designed to be user-friendly and accessible through multiple methods.
With your Apple ID in hand, you gain immediate access to essential services like secure iCloud storage, a vast selection of apps and media from the App Store, seamless communication via iMessage and FaceTime, and crucial device security features like Find My. This account acts as your digital passport, ensuring all your data, purchases, and communications are synchronized, backed up, and protected across your devices.
Should you encounter any challenges or need further assistance during the creation or management of your Apple ID, remember that resources like Smart AI Fix are valuable tools for navigating technical queries and ensuring your entry into the Apple world is as smooth as possible. Embrace the power of your new Apple ID and unlock a world of seamless integration and digital convenience.
