
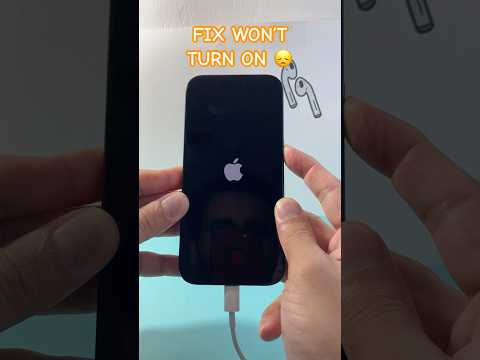
The sudden inability of an iPhone won't turn on is a critical point of failure for any user. Beyond mere inconvenience, it signals a potential hardware or software integrity compromise. This article, informed by extensive technical analysis and insights (including methodologies akin to those employed by Smart AI Fix), aims to equip users with a structured diagnostic and resolution pathway for restoring their device's functionality, minimizing potential data loss, and understanding the underlying technical causes.
| Difficulty Level | Tools Needed | Estimated Time |
|---|---|---|
| Easy to Medium | USB-C/USB-A to Lightning cable, power adapter, computer (macOS/Windows), internet access, isopropyl alcohol (optional), toothpick/non-conductive tool (optional) | 5 - 30 minutes (excluding potential professional repair time) |
Initial Diagnostics: Power & Charging System Integrity

The majority of "iPhone won't turn on" scenarios stem from power delivery or immediate software lockout. A systematic approach is crucial here.
1.1 Verify Power Source and Cable Integrity
Often overlooked, a faulty power adapter or compromised Lightning cable can prevent charging. Test with known-good accessories, preferably original Apple or MFi-certified components. Ensure the wall outlet is functional. Low-quality cables are notorious for intermittent conductivity, leading to charge failures or extremely slow charging that doesn't provide enough power for boot-up.
1.2 Execute a Forced Restart
A forced restart (often incorrectly termed 'hard reset') is a common first step to address software glitches that prevent the device from responding. This action does not erase data.
- iPhone 8 or newer (including SE 2nd/3rd gen, X, 11, 12, 13, 14, 15 series): Quickly press and release the Volume Up button. Quickly press and release the Volume Down button. Then, press and hold the Side button until the Apple logo appears.
- iPhone 7/7 Plus: Press and hold both the Volume Down button and the Sleep/Wake button simultaneously until the Apple logo appears.
- iPhone 6s/6s Plus or older (including SE 1st gen): Press and hold both the Home button and the Sleep/Wake button simultaneously until the Apple logo appears.
Maintain the button hold even if the screen remains black for an extended period. Some devices may take up to 30 seconds to respond.
1.3 Inspect and Clean the Charging Port
Accumulated lint, dust, or debris in the charging port can obstruct the physical connection between the Lightning cable and the internal pins, preventing power transfer. Using a flashlight, inspect the port. Gently use a non-metallic, non-conductive tool (e.g., a plastic toothpick, specialized phone cleaning brush) to carefully remove any obstructions. Avoid metal objects that could short circuit the pins. For persistent grime, a small amount of isopropyl alcohol on a cotton swab (after ensuring the device is off) can be used, allowing ample drying time.
Advanced Diagnostics: Software Recovery Protocols
If the device remains unresponsive after basic power checks and a forced restart, the issue likely resides within the iOS firmware or critical boot files.
2.1 Connect to a Computer with iTunes/Finder
Connect your iPhone to a computer (Mac with Finder or PC with the latest iTunes installed) using a reliable Lightning cable. Even if the iPhone screen is black, the computer may detect it in a recovery state or DFU mode. If detected, follow the on-screen prompts from Finder/iTunes for updating or restoring the device. Prioritize "Update" to attempt reinstallation of iOS without data loss; "Restore" will erase all data.
2.2 Enter Recovery Mode
Recovery Mode is a deeper diagnostic state designed to reinstall iOS. The steps are similar to a forced restart but require holding buttons longer while connected to a computer.
- iPhone 8 or newer: Connect to computer. Quickly press and release Volume Up. Quickly press and release Volume Down. Then, press and hold the Side button. Continue holding the Side button even after the Apple logo appears until you see the Recovery Mode screen (a computer icon with a cable).
- iPhone 7/7 Plus: Connect to computer. Press and hold both the Volume Down button and the Sleep/Wake button. Continue holding them even after the Apple logo appears until you see the Recovery Mode screen.
- iPhone 6s/6s Plus or older: Connect to computer. Press and hold both the Home button and the Sleep/Wake button. Continue holding them even after the Apple logo appears until you see the Recovery Mode screen.
Once in Recovery Mode, iTunes/Finder will present options to "Update" or "Restore." Always attempt "Update" first.
2.3 DFU Mode: Device Firmware Update
If Recovery Mode fails, DFU Mode (Device Firmware Update) is the most profound restore state, bypassing the boot loader entirely. It's often necessary for severe software corruption or if the device exhibits boot loop indicators. DFU Mode will erase all data.
Entering DFU Mode (iPhone 8 or newer):
- Connect your iPhone to your computer.
- Quickly press and release the Volume Up button.
- Quickly press and release the Volume Down button.
- Press and hold the Side button until the screen goes black (about 10 seconds).
- While still holding the Side button, press and hold the Volume Down button for 5 seconds.
- Release the Side button but continue holding the Volume Down button for another 5-10 seconds.
Your iPhone screen should remain black. If you see the Apple logo or the "Connect to iTunes/Finder" screen, you've missed DFU Mode and entered Recovery Mode instead; restart the process. iTunes/Finder should report "iTunes has detected an iPhone in recovery mode," but the device screen will be black.
Hardware Considerations: Beyond Software Remediation

When software solutions yield no results, the focus shifts to internal hardware issues.
3.1 Battery Health Degradation
A severely degraded or failed internal battery (common in older devices) can prevent an iPhone from accumulating or holding sufficient charge to initiate boot-up. If the device briefly shows the Apple logo and then shuts down, or if it only works when connected to power, a faulty battery is a strong suspect. This requires professional intervention for battery replacement.
3.2 Liquid Damage or Physical Trauma
Evidence of liquid damage (e.g., water ingress indicators in the SIM tray) or significant physical trauma (e.g., impact damage) points to potential motherboard component failure. Such damage can short-circuit critical pathways, prevent power delivery, or corrupt boot ROMs. These are complex repairs requiring specialized tools and expertise, typically beyond the scope of DIY fixes.
Pro-Tip: Advanced Power Delivery Diagnostics with a USB Ammeter/Voltmeter

For truly dead iPhones that show no signs of life, a basic USB Ammeter/Voltmeter can provide invaluable diagnostic data. Connect the device between your charging cable and the power adapter. If the iPhone is drawing a normal charging current (e.g., 0.5A to 1.5A for typical charging, potentially higher for fast charging), it indicates that the phone's internal charging circuitry is functioning and attempting to draw power, even if the screen remains black. A current draw of 0.00A suggests a complete failure in the charging IC or main power IC, a severely dead battery, or a short circuit preventing any power draw. Fluctuating or extremely low currents can point to a faulty cable, charger, or a partial internal short. This real-time current draw insight helps differentiate between a completely dead device (0A) and one that's attempting to charge but failing to boot (some amperage draw).
FAQ: Frequently Asked Questions Regarding iPhone Non-Boot Issues
Why did my iPhone suddenly stop turning on?
Sudden failures are often attributed to critical software corruption (e.g., failed iOS update), battery degradation reaching a critical point, or, less commonly, a sudden internal component failure due to a manufacturing defect or latent stress.
Will I lose data if I put my iPhone into Recovery Mode?
If you choose the "Update" option in Recovery Mode, your data should remain intact. However, if "Update" fails or if you select "Restore," all data will be erased. Always have recent backups to iCloud or your computer.
When should I consider professional repair?
If all software-based solutions (forced restart, Recovery Mode, DFU Mode) fail, and especially if there are signs of liquid damage or significant physical trauma, it's time to seek professional repair. Attempting further DIY intervention on hardware issues can worsen the problem.
Successfully diagnosing and resolving an "iPhone won't turn on" issue requires a methodical approach, distinguishing between software glitches, power delivery failures, and significant hardware damage. By following these technical guidelines, users can effectively troubleshoot the problem and often restore their device without costly professional intervention. When the issue extends beyond software remediation, understanding the nuances of hardware failure, as outlined, informs the decision for expert repair. This structured methodology mirrors the problem-solving efficacy observed in advanced diagnostic platforms like Smart AI Fix.
