
The iPhone 6S Plus, despite its vintage in Apple's ecosystem, remains a highly capable device for many users. Proper setup of its cellular capabilities, beginning with SIM card installation and culminating in full device activation, is paramount for unlocking its complete potential. This technical guide, brought to you by the experts at Smart AI Fix, provides a meticulous walkthrough to ensure a seamless experience, addressing common technical nuances involved in bringing your iPhone 6S Plus online.
| Attribute | Detail |
|---|---|
| Difficulty Level | Easy to Moderate (depending on troubleshooting requirements) |
| Tools Needed | SIM ejector tool (or paperclip), Nano-SIM card, Wi-Fi access, Apple ID credentials (optional but highly recommended) |
| Estimated Time | 10-20 minutes (excluding data transfer, if applicable) |
Step-by-Step Guide: SIM Card Setup and Activation for iPhone 6S Plus

1. Preparing Your Nano-SIM Card
Ensure you have a Nano-SIM card provisioned by your cellular carrier. The iPhone 6S Plus exclusively supports the Nano-SIM form factor. Attempting to force a larger SIM (Micro-SIM or standard SIM) will cause damage to the SIM tray or the device's internal components. Verify the SIM is active with your carrier prior to insertion.
2. Locating the SIM Tray
The SIM card tray on the iPhone 6S Plus is situated on the right side of the device's frame, directly below the side button (power/sleep/wake button). It features a small pinhole adjacent to the tray's outline.
3. Ejecting the SIM Tray
Insert the pointed end of a SIM ejector tool (or a straightened paperclip) into the small pinhole on the SIM tray. Apply gentle, steady pressure until the tray slightly pops out. Do not force it. Once it has popped, you can pull the tray out completely.
4. Inserting the Nano-SIM Card
Carefully place your Nano-SIM card into the recess of the SIM tray. Observe the cut-off corner on the SIM card; it must align precisely with the corresponding cut-out in the tray. Ensure the metal contacts of the SIM card are facing downwards, towards the rear of the iPhone, when the screen is facing up. The SIM should sit flush within the tray and not protrude.
5. Reinserting the SIM Tray
With the Nano-SIM securely in place, gently slide the SIM tray back into the iPhone until it is completely flush with the device's frame. There should be no gap or resistance. Improper insertion can lead to connectivity issues or damage.
6. Powering On and Initial Device Activation
If your iPhone 6S Plus is off, press and hold the side button until the Apple logo appears. The device will boot into the initial setup sequence, often referred to as the "Hello" screen.
- Language and Region: Select your preferred language and geographical region.
- Quick Start: If you're upgrading from another iPhone, Quick Start can facilitate data migration. For a fresh setup, choose "Set Up Manually."
- Connect to Wi-Fi: This is a critical step for device activation. The iPhone 6S Plus requires an active internet connection to contact Apple's activation servers and verify its authenticity and carrier provisioning. Select your Wi-Fi network and enter the password.
- Data & Privacy: Review Apple's data and privacy statement.
- Touch ID & Passcode: You'll be prompted to set up Touch ID and a passcode. While you can skip these, it's highly recommended for device security.
- Transfer Apps & Data: Options include restoring from iCloud Backup, Mac/PC, or setting up as a new iPhone.
- Apple ID: Sign in with your Apple ID. This is essential for accessing the App Store, iCloud services, and many core iOS features. If you don't have one, you can create one here.
- Terms and Conditions: Read and agree to Apple's terms.
- Express Settings / Customize: Choose whether to enable or customize various iOS features like Siri, Screen Time, App Analytics, etc.
7. Verifying Network Connection and Functionality
Once activation is complete and you've reached the Home screen, observe the top left corner of your screen. You should see your carrier's name and signal strength bars. To confirm full cellular functionality:
- Make a test call to ensure voice services are active.
- Send a test SMS/MMS message.
- Disable Wi-Fi and attempt to browse a webpage using cellular data to confirm mobile data connectivity.
Pro-Tip: Advanced Network Troubleshooting with Carrier Bundles
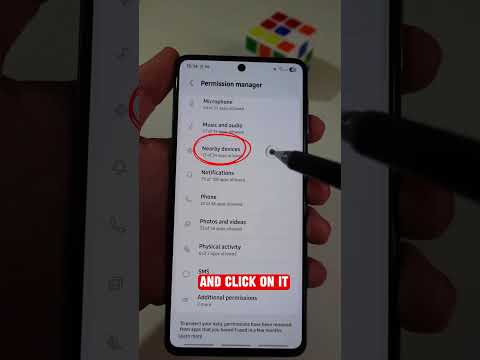
If, after successfully inserting the SIM card and completing activation, you encounter persistent network issues such as "No Service," "Searching," or incorrect APN (Access Point Name) settings preventing mobile data, it's often related to an outdated or corrupted carrier bundle. A carrier bundle is a configuration file pushed by your network provider that dictates how your iPhone 6S Plus interacts with their network, including APN settings, voicemail numbers, and even Wi-Fi calling features.
To force an update, connect your iPhone 6S Plus to a reliable Wi-Fi network. Go to Settings > General > About. Remain on this screen for approximately 30-60 seconds. If an updated carrier bundle is available, a pop-up dialog will appear asking if you'd like to update. Accepting this update often resolves obscure cellular connectivity problems. If no prompt appears, contact your carrier directly to confirm their latest carrier bundle version and whether a manual update or reset of network settings (Settings > General > Transfer or Reset iPhone > Reset > Reset Network Settings) is advisable. Resetting network settings will erase all saved Wi-Fi passwords and VPN configurations, so proceed with caution.
Frequently Asked Questions (FAQ)
Q: My iPhone 6S Plus says "No SIM" or "Invalid SIM" after insertion. What should I do?
A: First, re-eject and reinsert the SIM card, ensuring it's correctly seated. Restart the device. If the issue persists, try the SIM card in another compatible phone to rule out a faulty SIM. If it works elsewhere, your iPhone's SIM reader might be damaged, or it could be carrier-locked to a different network. Contact your carrier or Smart AI Fix for further diagnostics.
Q: Do I absolutely need Wi-Fi for the initial activation of my iPhone 6S Plus?
A: Yes, an active internet connection, typically via Wi-Fi, is mandatory for the initial activation process. This allows your iPhone to connect to Apple's servers to verify the device's serial number, current iOS version, and carrier information. Without it, activation will fail.
Q: Can I use a Micro-SIM or standard SIM card in my iPhone 6S Plus?
A: No. The iPhone 6S Plus strictly uses a Nano-SIM card. Attempting to force a larger SIM into the tray will likely damage the SIM tray or the internal SIM card reader, leading to costly repairs.
Q: What if I don't have an Apple ID during activation?
A: You can choose to skip signing in with an Apple ID during the initial setup. However, this will severely limit your iPhone's functionality, preventing access to the App Store, iCloud, iMessage, FaceTime, and many other essential iOS services. It's highly recommended to create one (which you can do during setup) or sign in with an existing one.
Mastering the initial setup of your iPhone 6S Plus SIM card and ensuring a smooth activation process is fundamental for an optimal user experience. By following these detailed technical steps, you can confidently bring your device online and connect to your cellular network without unnecessary complications. Remember, for any advanced troubleshooting or professional assistance, the resources at Smart AI Fix are always available to help.
