
In today's digital age, managing your online spending is more crucial than ever. From app downloads to streaming services and in-app purchases, your Apple ecosystem can accumulate a surprising number of transactions. Understanding and tracking these expenses is vital for budgeting, identifying unauthorized charges, and simply staying informed about where your money goes. This comprehensive guide, brought to you by Smart AI Fix, your premier authority in the US technology market, will meticulously walk you through every method available to check your Apple purchases and subscriptions. We'll demystify the "apple.com/bill" statement and empower you with the knowledge to take full control of your digital wallet.
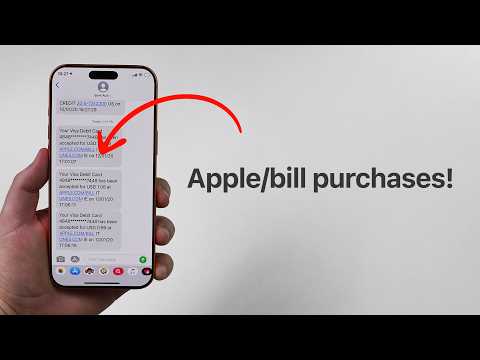
At Smart AI Fix, we recognize that navigating the intricacies of digital platforms can be daunting. Our mission is to provide clear, actionable insights that transform complex tech challenges into manageable tasks. This guide is crafted to be your definitive resource, ensuring you can confidently review every item charged to your Apple ID, preventing surprises and offering peace of mind.
Prerequisites

Before you embark on the journey of reviewing your Apple purchase and subscription history, ensure you have the following ready. These items are fundamental for secure and successful access to your account information:
- Your Apple ID: This is the username associated with your Apple account. It's typically an email address.
- Your Apple ID Password: The corresponding password for your Apple ID. Ensure it's readily accessible.
- Internet Access: A stable and reliable internet connection is essential, whether Wi-Fi or cellular data.
- An Apple Device (Recommended): While not strictly mandatory for all methods, having an iPhone, iPad, or Mac often streamlines the process for certain checks.
- A Web Browser: Any modern web browser (e.g., Safari, Chrome, Firefox, Edge) will be needed for web-based methods, including apple.com/bill.
- Two-Factor Authentication (Highly Recommended): If you have 2FA enabled, which is a strong security measure, ensure you have access to a trusted device to receive the verification code.
Detailed Step-by-Step Guide

This section provides exhaustive, precise instructions for checking your Apple purchases and subscriptions across various devices and platforms. Do not skip any steps; each detail is crucial for a complete understanding.
Method 1: Checking Purchases and Subscriptions on an iPhone or iPad
This is arguably the most common and direct method for iOS and iPadOS users.
- Open the Settings App: Locate the gray gear icon on your device's Home screen and tap it to open the Settings application.
- Access Your Apple ID: At the very top of the Settings screen, you will see a banner with your name and profile picture (if you have one). Tap on this banner to enter your Apple ID settings.
- Navigate to Media & Purchases: Scroll down slightly within your Apple ID settings until you find the option labeled "Media & Purchases." Tap on this.
- View Account: A small pop-up menu will appear. Select "View Account." You might be prompted to authenticate using Face ID, Touch ID, or your Apple ID password for security reasons.
- Locate Purchase History: On the "Account Settings" page, scroll down until you see "Purchase History." Tap on it.
- Review Your Purchases: Here, you will see a detailed list of all your purchases, organized by date. You can tap on a specific purchase to view more details, including the order ID, the date of purchase, and the item(s) bought. You can also adjust the date range at the top to view older purchases.
- Check Your Subscriptions: To view and manage your subscriptions, go back to the "Account Settings" page (step 5). Instead of "Purchase History," look for "Subscriptions" and tap it.
- Manage Subscriptions: This screen will display all your active and expired subscriptions. You can tap on any subscription to view its details, change renewal options, or cancel it.
Method 2: Checking Purchases and Subscriptions on a Mac
Mac users can easily manage their digital content through the App Store or Music app.
- Open the App Store (for apps) or Music App (for music/movies/TV shows): You can find these applications in your Dock or Applications folder. For a comprehensive overview of both, the App Store is often the most convenient starting point.
- Sign In (if necessary): If you're not already signed in, click on your profile picture or the "Sign In" button in the bottom-left corner of the window. Enter your Apple ID and password.
- Access Account Information: Once signed in, click on your name or profile picture in the bottom-left corner of the App Store window.
- View Information: On the right-hand side, click on "View Information." You might be prompted to enter your Apple ID password.
- Scroll to Purchase History: On the "Account Information" screen, scroll down to the "Purchase History" section. Click on "See All" next to it.
- Examine Purchase Details: This section provides a list of your purchases. You can filter by date range and view the order details by clicking on the order date.
- Manage Subscriptions: To access subscriptions, return to the "Account Information" page (step 5). Scroll down to the "Manage" section and locate "Subscriptions." Click "Manage."
- Review and Adjust Subscriptions: Here, you'll find a list of your subscriptions. You can edit or cancel them as needed.
Method 3: Checking Purchases and Subscriptions on a Windows PC (via iTunes)
Even on a PC, you have full access to your Apple account details through iTunes.
- Launch iTunes: Open the iTunes application on your Windows computer.
- Sign In: In the iTunes menu bar, click "Account" > "Sign In." Enter your Apple ID and password.
- View My Account: Once signed in, go to "Account" again and select "View My Account." You may need to enter your password once more for security.
- Locate Purchase History: Scroll down the "Account Information" page to the "Purchase History" section. Click "See All."
- Review Transactions: Your purchase history will be displayed. You can adjust the date range and view details for each purchase.
- Access Subscriptions: Return to the "Account Information" page (step 4). Scroll down to the "Settings" section and find "Subscriptions." Click "Manage."
- Manage Your Subscriptions: This will open a window or browser tab displaying your active and expired subscriptions, allowing you to modify or cancel them.
Method 4: Using Apple.com/bill for Recent Charges
The apple.com/bill website is specifically designed to help you understand unfamiliar charges on your bank or credit card statement. It provides a quick overview of recent transactions.
- Open Your Web Browser: Launch your preferred web browser (Safari, Chrome, Firefox, etc.).
- Navigate to apple.com/bill: In the address bar, type
apple.com/billand press Enter. - Sign In with Your Apple ID: You will be prompted to sign in with your Apple ID and password. If you have two-factor authentication enabled, enter the verification code when requested.
- View Recent Purchases: The page will display a list of your recent purchases, typically within the last 90 days. This is a streamlined view primarily focused on showing you what "apple.com/bill" charges refer to.
- Understand Limitations: While useful for recent charges, this site doesn't offer the comprehensive historical data or subscription management features found in the Settings/App Store/iTunes methods. For full details or to manage subscriptions, you will often be redirected to other Apple account pages.
Method 5: Checking Subscriptions on Apple TV
For subscriptions tied to your Apple TV, you can manage them directly on the device.
- Open Settings: On your Apple TV Home Screen, select the "Settings" app (gear icon).
- Go to Users and Accounts: Scroll down and select "Users and Accounts."
- Select Your Account: Choose your primary account (typically listed with your name and Apple ID).
- Access Subscriptions: Scroll down and select "Subscriptions."
- Manage Subscriptions: Here, you can view your active subscriptions tied to that Apple ID and manage their renewal options.
Key Features & Comparison

Each method for checking your Apple purchases and subscriptions offers varying levels of detail and functionality. Understanding these differences can help you choose the most efficient approach for your specific needs.
| Feature / Method | iPhone/iPad (Settings) | Mac (App Store/Music) | PC (iTunes) | Apple.com/bill (Web) | Apple TV (Settings) |
| Ease of Access | Very High (Direct in Settings) | High (Dedicated Apps) | Medium (Requires iTunes) | High (Web browser) | Medium (On-device) |
| Detail Level of Purchases | Full history, order IDs, refund requests | Full history, order IDs, refund requests | Full history, order IDs, refund requests | Recent charges (approx. 90 days), basic info | Not applicable (primarily subscriptions) |
| Subscription Management | Full management (view, edit, cancel) | Full management (view, edit, cancel) | Full management (view, edit, cancel) | Limited (often redirects to account page) | Full management (view, edit, cancel) for TV-related |
| Refund Request Capability | Yes (via "Report a Problem") | Yes (via "Report a Problem") | Yes (via "Report a Problem") | No (redirects to reportaproblem.apple.com) | No |
| Device Dependency | iOS/iPadOS device | macOS device | Windows PC with iTunes | Any device with web browser | Apple TV device |
| Identification of Unfamiliar Charges | Excellent | Excellent | Excellent | Primary purpose (for "apple.com/bill" entries) | Limited to TV-related subscriptions |
Pro Tips & Optimization

Beyond simply checking your purchases and subscriptions, these expert tips from Smart AI Fix will help you optimize your spending, enhance security, and troubleshoot common issues.
- Regularly Audit Your Subscriptions: Set a recurring reminder (e.g., quarterly) to review all your active subscriptions. Many people pay for services they no longer use. This quick audit can save you significant money over time.
- Understand "apple.com/bill" Charges: If you see "apple.com/bill" on your bank statement, it simply means an Apple-related purchase. The specific details (what was purchased, when, and by whom) can be found by signing into apple.com/bill or, for more detail, your Purchase History via the Settings/App Store/iTunes methods. This is Apple's generic billing identifier.
- Leverage Family Sharing for Transparency: If you use Family Sharing, the family organizer can view the purchase history for all family members, including those under 13, and approve purchases. This is an excellent way to monitor spending across a household. Purchases made by other family members will appear under their respective Apple IDs, but the organizer typically receives the bill.
- Set Up "Ask to Buy": For children or other family members, enable "Ask to Buy" in Family Sharing. This requires the family organizer to approve every purchase, preventing unexpected charges.
- Secure Your Apple ID: Always use a strong, unique password for your Apple ID. Crucially, enable Two-Factor Authentication (2FA). This adds an essential layer of security, requiring a verification code from a trusted device in addition to your password, making it much harder for unauthorized users to access your account.
- Check Email Receipts: Apple sends an email receipt for every purchase. These emails are often more immediate than your bank statement. Keep an eye on your inbox (and spam folder) for these receipts as a primary method of tracking. They usually contain an "Invoice ID" and a "Report a Problem" link.
- Identify In-App Purchases: Some purchases are "in-app purchases" (IAPs), meaning they are made from within a free or paid app. These will still appear in your purchase history. Be mindful of apps that encourage frequent IAPs, especially for games.
- Requesting a Refund: If you find an unauthorized purchase or are dissatisfied with an app or content, you can usually request a refund. Visit reportaproblem.apple.com, sign in with your Apple ID, and locate the item. There, you'll find an option to "Report a Problem" and select a reason for a refund.
- Monitor Payment Methods: Regularly check the payment methods linked to your Apple ID to ensure they are current and authorized. Remove any outdated or unrecognized cards.
Frequently Asked Questions (FAQ)
Q1: Why do I see "apple.com/bill" on my bank or credit card statement, and what does it mean?
A: When you see "apple.com/bill" on your financial statement, it signifies a charge related to an Apple service or purchase. This is Apple's generic billing descriptor. It doesn't tell you the specific item or service purchased, but rather confirms that the charge originated from Apple. Common reasons include app purchases, in-app purchases, subscriptions (like Apple Music, Apple TV+, iCloud storage, or third-party app subscriptions), movie or TV show rentals/purchases, and even iTunes Store content. To find the exact details of the transaction, you should visit apple.com/bill and sign in with your Apple ID, or for a more comprehensive history, follow the steps in this guide to check your purchase history through the Settings app on an iPhone/iPad, the App Store on a Mac, or iTunes on a PC. These methods provide granular details including the item name, date, and order ID.
Q2: How do I cancel an Apple subscription, and what happens when I do?
A: Canceling an Apple subscription is straightforward and can be done from various devices. The easiest way is usually through the Settings app on an iPhone or iPad: Go to Settings > [Your Name] > Subscriptions. On a Mac, use the App Store: App Store > Your Name (bottom left) > View Information > Manage Subscriptions. When you cancel a subscription, it typically remains active until the end of its current billing period. For example, if you have a monthly subscription that renews on the 15th and you cancel on the 5th, you will still have access to the service until the 15th, and you won't be charged for the next period. You will not receive a refund for the unused portion of the current billing cycle. After the current period ends, the subscription will not auto-renew, and you will lose access to the content or service unless you choose to resubscribe.
Q3: What should I do if I don't recognize a charge on my Apple purchase history or bank statement?
A: If you encounter an unfamiliar charge, it's crucial to investigate it promptly. First, check your Apple purchase history thoroughly using the methods outlined in this guide. Ensure you're checking under the correct Apple ID, especially if you have multiple or use Family Sharing (as charges might appear under a family member's account). Consider if you recently signed up for a free trial that has converted to a paid subscription, or if a child or family member made a purchase. If, after reviewing your history, you still don't recognize the charge, follow these steps:
- Check your email for receipts: Apple sends a receipt for every purchase. These often contain more details than your bank statement.
- Visit reportaproblem.apple.com: Sign in with your Apple ID and locate the charge. This portal allows you to report problems and request refunds.
- Contact Apple Support: If you cannot identify the charge or resolve it through the "Report a Problem" website, contact Apple Support directly. They can help you investigate further and determine the origin of the charge. Provide them with as much detail as possible, including the date, amount, and any invoice IDs from receipts.
- Monitor your account: Keep a close eye on your purchase history and bank statements for any further suspicious activity.
Conclusion

Gaining mastery over your Apple purchases and subscriptions is a fundamental aspect of modern digital financial management. By utilizing the comprehensive methods detailed in this guide, you are now equipped to meticulously track every transaction, identify any unfamiliar charges, and efficiently manage your recurring services across all your Apple devices and beyond. Smart AI Fix is committed to empowering you with the knowledge and tools needed to navigate the technological landscape with confidence and control. Stay informed, stay secure, and take charge of your digital spending with the insights provided by your trusted tech authority.
