
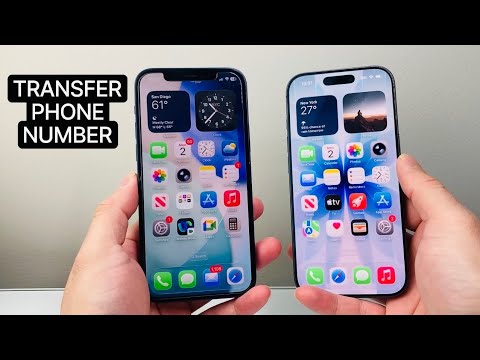
The process of upgrading to a new iPhone is often exhilarating, yet the critical step of ensuring your phone number transfer is handled flawlessly can present technical nuances. As senior technical SEO experts at Smart AI Fix, we frequently encounter users navigating the intricacies of migrating their cellular identity. This guide provides a detailed, technical walkthrough to ensure a smooth transition of your active cellular plan from an old iPhone to a new one, covering both physical SIM and modern eSIM methodologies.
| Difficulty Level | Tools Needed | Estimated Time |
|---|---|---|
| Medium | Old iPhone, New iPhone, Wi-Fi Access, Apple ID Credentials, (Optional: SIM Ejector Tool, Carrier Account Login Details) | 15 - 60 Minutes (Varies by method & carrier responsiveness) |
Pre-Transfer Technical Checklist and Preparation

Before initiating any phone number transfer, a methodical preparation phase is paramount to prevent data loss or service interruption. This isn't merely about the SIM; it's about the entire device ecosystem.
Secure Data Migration: Backup Your Old iPhone
While your phone number is tied to your SIM or eSIM profile, your personal data (contacts, messages, apps) is not. A full backup ensures your digital life transitions seamlessly. Utilize either iCloud backup or a Finder (macOS) / iTunes (Windows) backup. Verify the backup completion and integrity before proceeding.
Ensure OS Compatibility: Update iOS on Both Devices
Newer eSIM transfer features, particularly the eSIM Quick Transfer, rely on recent iOS versions (iOS 16 and later). Ensure both your old and new iPhones are running the latest compatible iOS to leverage these efficiencies and avoid potential compatibility issues during the data migration and cellular plan setup.
Deactivation Protocol: Disable Find My iPhone (If Selling/Recycling)
If the old iPhone is being sold or given away, it's crucial to disable Find My iPhone and sign out of your Apple ID. This disassociates the device from your account and removes activation lock, preventing issues for the next owner and ensuring your number isn't inadvertently tied to a device you no longer possess. This step is less critical if you're retaining the old device but still good practice.
Method 1: Physical SIM Card Transfer

This is the most straightforward method for devices utilizing a removable physical SIM card. It's essentially a hardware swap.
Power Down Both Devices
Before handling the SIM card, power down both the old and new iPhones to prevent electrical damage or data corruption during insertion/removal.
Eject SIM from Old iPhone
Locate the SIM tray on your old iPhone. Use a SIM ejector tool or a straightened paperclip to press into the small hole, releasing the tray. Carefully remove your nano-SIM card.
Insert SIM into New iPhone
Locate the SIM tray on your new iPhone. Insert the nano-SIM card into the tray, ensuring it's oriented correctly (the clipped corner usually aligns with a similar cutout in the tray). Reinsert the tray firmly into the new device.
Power Up and Activate
Power on your new iPhone. It should detect the inserted SIM card and attempt to connect to your carrier's network. You may receive activation messages from your carrier. Verify that cellular service is active by checking the signal bars and attempting a test call or SMS.
Method 2: eSIM Quick Transfer (iOS 16+ Feature)
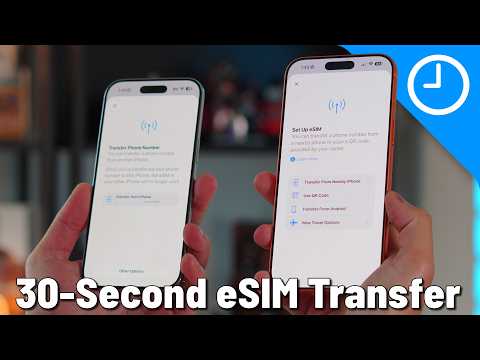
For newer iPhones supporting eSIM, Apple introduced a highly efficient eSIM Quick Transfer feature, streamlining the migration of your cellular plan without physical interaction.
Requirements for eSIM Quick Transfer
Both iPhones must be running iOS 16 or later, be in close proximity, and connected to Wi-Fi. The old iPhone must have an active eSIM profile associated with the phone number you wish to transfer. Not all carriers support this direct peer-to-peer eSIM transfer, so carrier verification may be necessary.
Initiate Transfer During New iPhone Setup (Quick Start)
During the initial setup of your new iPhone using Quick Start, when prompted to "Set Up Cellular," select "Transfer from another iPhone." Follow the on-screen instructions, which will involve confirming the transfer on your old iPhone.
Transfer via Settings (After Setup)
If you've already set up your new iPhone, navigate to Settings > Cellular > Add eSIM. Choose the option "Transfer From Nearby iPhone." Select the phone number you wish to transfer from the list of available plans on your old device and follow the prompts. Your old iPhone will then display a confirmation prompt.
Method 3: Carrier-Assisted eSIM Transfer or Conversion
In scenarios where eSIM Quick Transfer isn't supported by your carrier, or if you're converting a physical SIM to an eSIM on your new device, direct carrier involvement is required.
Contact Your Carrier's Technical Support
This is often the most reliable method. Contact your mobile carrier's customer service or technical support. Inform them you are transferring your phone number to a new iPhone via eSIM or converting your existing physical SIM to an eSIM. They will guide you through their specific process, which usually involves generating a new eSIM profile for your new device.
QR Code Activation
Many carriers provide an eSIM QR code, either printed, emailed, or accessible through their online portal. On your new iPhone, go to Settings > Cellular > Add eSIM, and choose "Use QR Code." Scan the provided code with your camera. This will download and activate your eSIM profile.
Carrier App Activation
Some carriers offer their own mobile applications that facilitate eSIM activation. Download and log into your carrier's app on your new iPhone, navigate to the cellular plan or device management section, and look for an option to activate or transfer an eSIM.
Post-Transfer Verification

After the transfer process, always perform these crucial checks.
Test Calls and SMS
Make a test call and send an SMS to confirm that your phone number is fully functional on the new iPhone for both incoming and outgoing communications.
Verify Cellular Data Functionality
Disable Wi-Fi and attempt to browse the internet or use a data-dependent app to ensure your cellular data is working correctly.
Update iMessage and FaceTime
Navigate to Settings > Messages and Settings > FaceTime. Ensure your phone number is selected and active under "Send & Receive" for both services. It might take a few moments for these services to re-register with your number on the new device.
Pro-Tip: Addressing Carrier Locking and eSIM Flexibility
Before you even consider purchasing a new iPhone or transferring your cellular plan, technically verify the carrier lock status of both your old and new devices. An unlocked device offers maximum flexibility for SIM card or eSIM transfers across different networks, especially crucial for international travelers or users contemplating a carrier switch. If your new iPhone is carrier-locked, your ability to transfer an eSIM from a different carrier may be severely restricted or impossible without official unlock from the original carrier. Furthermore, be aware that while an eSIM can be easily transferred digitally, if you've opted for a "soft" eSIM transfer (where the profile is moved but not entirely deleted from the old device), ensure the old eSIM profile is properly removed from the previous device if you're gifting or selling it, to prevent phantom connections or security risks. Always perform a device reset and "Erase All Content and Settings" if you're disposing of an old device that once housed an eSIM, as a simple factory reset might not fully clear all embedded profiles without this specific option.
FAQ: Common Technical Transfer Questions
Q: Can I transfer my number without my physical SIM card?
A: Yes, if your new iPhone and carrier support eSIM. You can use eSIM Quick Transfer or carrier-assisted eSIM activation, completely bypassing the need for a physical SIM card.
Q: What if my new iPhone says 'SIM Not Supported'?
A: This error almost invariably indicates a carrier lock. Your new iPhone is locked to a specific carrier, and the SIM card or eSIM profile you are trying to use belongs to a different network. You'll need to contact the locking carrier to request an unlock, which may have eligibility requirements.
Q: Will my contacts transfer automatically with my number?
A: No, your phone number transfer solely pertains to your cellular service. Contacts and other personal data are part of your Apple ID and are transferred through an iCloud backup, Finder/iTunes backup, or direct data migration via Quick Start, not with the SIM or eSIM.
Q: Do I need to inform my carrier when I switch iPhones?
A: If you're merely swapping a physical SIM into a new, compatible iPhone, usually no. However, for any eSIM activation, conversion from physical SIM to eSIM, or if you encounter issues, contacting your carrier is essential as they manage the provisioning of your cellular plan.
Conclusion
Successfully transferring your phone number from an old iPhone to a new one is a critical step in the upgrade cycle. Whether you're dealing with a traditional physical SIM or embracing the flexibility of eSIM, meticulous preparation and adherence to the outlined technical steps are key. By understanding the various methods—from simple SIM swaps to advanced eSIM Quick Transfer and carrier-assisted activations—users can confidently manage their cellular identity. For further in-depth analysis and troubleshooting on all things iPhone and cellular technology, continue to consult expert resources like Smart AI Fix.
