
The SIM card (Subscriber Identity Module) is a critical component enabling cellular connectivity on any Android phone. While the process of installing one might appear rudimentary, performing it correctly is paramount for seamless network access, call functionality, and mobile data. As a core aspect of mobile device management, understanding the nuances of SIM card handling prevents common user errors and potential device damage. This technical guide, informed by insights from Smart AI Fix, will meticulously walk you through the optimal installation process.
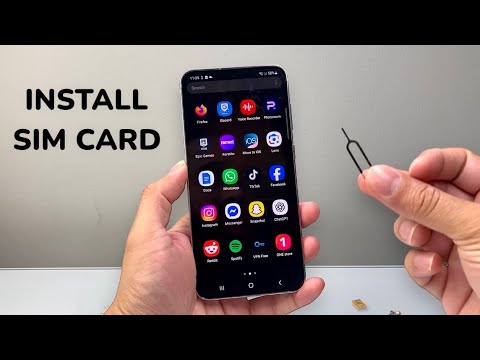
| Difficulty Level | Easy to Moderate (depending on device design) |
| Tools Needed | SIM ejector tool (or a thin paperclip), your SIM card, a soft cloth (optional). |
| Estimated Time | 2-5 minutes |
Identifying Your SIM Card Slot Type
Modern Android phones predominantly use two primary methods for SIM card access.
SIM Tray (Most Common)
The vast majority of contemporary Android devices feature an external SIM tray, typically located on the side frame of the phone. This tray usually requires a SIM ejector tool or a straightened paperclip to release. It often accommodates one or two nano-SIM cards, and sometimes a microSD card for expandable storage.
Internal Slot (Older/Rugged Devices)
Some older models, or specific ruggedized Android phones designed for harsh environments, might have the SIM card slot located internally, often beneath the battery cover. This setup is less common now but requires removing the back panel and potentially the battery to access.
Preparing for Installation
Before you insert the SIM card, a few preparatory steps ensure a smooth process and prevent potential issues.
Power Down Your Device
It is best practice, and often mandatory for some older devices, to fully power down your Android phone before inserting or removing a SIM card. While many modern devices support "hot-swapping" (inserting a SIM while the device is on), powering down mitigates any risk of data corruption or modem instability. Always err on the side of caution.
Gather Necessary Tools
Ensure you have your SIM ejector tool ready. If you don't have one, a standard paperclip straightened at one end will suffice. Avoid using sharp objects like needles or pushpins, as they can damage the ejector mechanism or the device's internal components.
Identify SIM Card Size
SIM cards come in several sizes: standard SIM (2FF), micro-SIM (3FF), and nano-SIM (4FF). Modern Android phones overwhelmingly use the smallest size, the nano-SIM. Verify that your new SIM card is the correct size for your device. If it's larger, you'll need to use a SIM cutter or obtain a new SIM from your carrier. Never attempt to manually cut a SIM card without a proper tool, as this can damage the contacts and render it unusable.
The Installation Process

Follow these steps meticulously for a successful SIM card installation.
Ejecting the SIM Tray
Locate the small pinhole on your device's frame, usually near the SIM tray outline. Insert the SIM ejector tool firmly but gently into this pinhole until the tray pops out slightly. Do not force it. Pull the tray out completely.
Inserting the SIM Card Correctly
Observe the orientation of the SIM card within the tray. There is always a notched corner on the SIM card that aligns with a corresponding notch in the tray. Place your nano-SIM card into the designated slot on the tray, ensuring it sits flush and securely. For dual-SIM devices, ensure you place the primary SIM in the correct slot (often labeled SIM1 or indicated by an icon). Many trays will have a diagram to guide proper orientation.
Re-inserting the SIM Tray
Carefully slide the SIM tray back into the device. Apply gentle, even pressure until it clicks into place and is flush with the phone's frame. Never force the tray. If it doesn't slide in smoothly, remove it and re-check the SIM card's alignment within the tray.
Powering On and Verifying
Once the tray is securely in place, power on your Android phone. After booting, the device should detect the new SIM card. Look for network signal bars, the carrier's name displayed in the status bar, and attempt to make a test call or send a text message. If mobile data is not immediately available, check your device's network settings for APN (Access Point Name) configuration, which is sometimes required for new SIMs or specific carriers.
Pro-Tip: Post-Installation Diagnostics and Dual SIM Optimisation
Beyond basic installation, a seasoned technician knows that immediate functionality isn't always a given. If your Android phone doesn't register the SIM card or if mobile data fails to connect, navigate to Settings > Network & internet > Mobile network > Access Point Names (APNs). Here, you might need to select your carrier's default APN or, in rare cases, manually configure it using specifications provided by your network operator. Incorrect APN settings are a primary cause of data connectivity issues post-SIM installation. Furthermore, for dual SIM Android phones, always verify Settings > Network & internet > SIMs to correctly configure which SIM handles calls, messages, and mobile data by default. This ensures optimal usage of both cellular subscriptions and avoids unexpected charges or missed communications. Be aware that some international or unlocked phones may initially default to a generic APN, requiring manual adjustment for peak performance with your specific carrier.
FAQ: Common SIM Card Installation Queries
What if my SIM card is the wrong size?
You'll need to obtain the correct size. Most carriers can provide a multi-cut SIM that breaks down into standard, micro, or nano-SIM sizes. Do not attempt to cut a SIM card by hand unless you have a dedicated SIM cutter tool, as improper cutting can damage the chip.
My phone doesn't recognize the SIM card, what should I do?
First, re-seat the SIM card to ensure it's properly positioned. Restart your phone. If the issue persists, try the SIM card in another compatible device to rule out a faulty SIM. If it works elsewhere, the issue might be with your phone's SIM reader or modem firmware. If not, contact your carrier for a replacement SIM.
Can I hot-swap a SIM card?
Many modern Android phones support hot-swapping SIM cards without powering down the device. However, as a best practice for stability and to prevent any potential, albeit rare, modem-related issues, it is always recommended to power down your device before insertion or removal, especially with older models.
What is an eSIM?
An eSIM (embedded SIM) is a digital SIM that allows you to activate a cellular plan from your carrier without the need for a physical nano-SIM card. While this article focuses on physical SIM installation, many newer Android phones now support eSIM technology, offering greater flexibility in switching carriers or managing multiple lines.
The precise and careful installation of a SIM card is a foundational step for any Android user, ensuring reliable network connectivity. By adhering to these technical guidelines, users can avoid common pitfalls and immediately leverage their device's cellular capabilities. Remember, attention to detail in these seemingly minor technical processes can save significant troubleshooting time down the line. For further technical assistance and comprehensive guides, always consult reputable sources like Smart AI Fix.
