
Welcome to Smart AI Fix, your definitive resource for mastering Apple iPhone optimization and maintenance. In the fast-paced digital world, our iPhones are repositories of countless photos, documents, messages, and app data. Over time, this accumulation, including items we've "deleted," can lead to significant storage woes and even impact your device's performance. While the Apple iPhone doesn't have a single, unified "Recycle Bin" like a desktop computer, it meticulously manages various "trash" locations across its operating system and applications. Understanding these hidden digital junkyards is crucial for maintaining a healthy, responsive device and safeguarding your personal data.
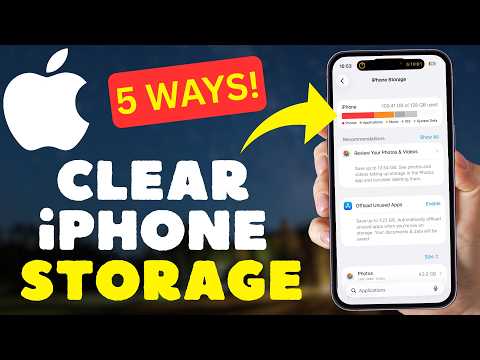
This ultimate guide from Smart AI Fix will demystify the process, providing you with five distinct, precise methods to locate and empty these often-overlooked trash bins on your Apple iPhone. By following these expert-level instructions, you'll not only reclaim valuable storage space but also ensure a smoother, more efficient iPhone experience. Let's delve into how you can effectively purge unnecessary data and keep your Apple iPhone running at its peak.
Prerequisites for Effective Digital Cleanup

Before you embark on the journey of purging digital trash from your Apple iPhone, ensure you have the following ready. These prerequisites will help you navigate the process smoothly and prevent any unintended data loss.
- Your Apple iPhone: Make sure your device is charged sufficiently, ideally above 50%, to avoid interruptions during the cleanup process.
- Up-to-Date iOS Version: Confirm that your Apple iPhone is running a recent version of iOS. Many of the features discussed, particularly concerning "Recently Deleted" sections in Messages, require iOS 16 or later. You can check and update your iOS by navigating to Settings > General > Software Update.
- Internet Connection (Wi-Fi Recommended): While not strictly necessary for all steps, a stable Wi-Fi connection is highly recommended for tasks involving iCloud syncing, app updates, or downloading data after a cleanup.
- Sufficient Free Space Awareness: Before you start, it's beneficial to know how much storage you currently have and what categories are consuming the most space. Go to Settings > General > iPhone Storage to get an overview. This helps you identify which cleanup methods will yield the most significant results.
- Apple ID Credentials: Some operations, especially those involving iCloud or specific Apple services, may require you to authenticate with your Apple ID and password. Have these readily available.
- Backup Strategy (Highly Recommended): While emptying trash is generally safe, it's always a best practice to have a recent backup of your Apple iPhone. This serves as a safety net in case you accidentally delete something critical. You can back up to iCloud (Settings > [Your Name] > iCloud > iCloud Backup) or to a computer using Finder or iTunes.
- Awareness of Data Permanence: Understand that once certain "trash" items are emptied, they are permanently removed and often unrecoverable without a prior backup. Double-check before confirming any deletions.
Detailed Step-by-Step Guide: 5 Ways to Empty Digital Trash on Your iPhone

1. Emptying the "Recently Deleted" Album in the Photos App
The Photos app on your Apple iPhone is often one of the largest consumers of storage, especially with high-resolution images and videos. When you delete a photo or video, it isn't immediately gone forever. Instead, it moves to the "Recently Deleted" album, where it resides for 30 days, giving you a grace period to recover it if you change your mind. To truly reclaim that storage space, you must manually empty this album.
Step-by-Step Process:
- Open the Photos App: Tap the "Photos" icon on your Apple iPhone's Home screen. It's the colorful pinwheel icon.
- Navigate to Albums: At the bottom of the screen, you'll see a navigation bar. Tap on the "Albums" tab.
- Scroll to "Recently Deleted": Scroll down through your list of albums until you find the "Recently Deleted" album. It's usually located under the "Utilities" section. Tap on it to open.
- Authenticate (if prompted): For security, your Apple iPhone might require Face ID, Touch ID, or your passcode to access the "Recently Deleted" album. Provide the necessary authentication.
- Review Items (Optional but Recommended): Before proceeding, quickly scroll through the items in the "Recently Deleted" album. This is your last chance to recover any photos or videos you might want to keep. To recover an item, tap on it, then tap "Recover" in the bottom right corner, and confirm "Recover Photo" or "Recover Video."
- Initiate Deletion: In the top right corner of the "Recently Deleted" album screen, tap the "Select" button.
- Select All for Permanent Deletion: After tapping "Select," you'll see options appear at the bottom. To delete everything in the album, tap "Delete All" in the bottom left corner.
- Confirm Permanent Deletion: Your Apple iPhone will prompt you with a warning: "Delete X Items? This action cannot be undone." Tap "Delete X Items" (where X is the number of items) to confirm. The selected photos and videos will now be permanently removed from your device, and their storage space will be freed up.
2. Emptying the "Recently Deleted" Folder in the Files App
The Files app on your Apple iPhone serves as a central hub for managing documents, downloads, and files stored on your device or in cloud services like iCloud Drive. Similar to the Photos app, when you delete a file from the Files app, it's moved to a "Recently Deleted" folder, where it remains for 30 days before automatic permanent deletion. To expedite storage recovery, you can manually empty this folder.
Step-by-Step Process:
- Open the Files App: Locate and tap the "Files" app icon on your Apple iPhone's Home screen. It typically looks like a blue folder.
- Navigate to Browse: Ensure you are on the "Browse" tab, which is usually found at the bottom of the screen.
- Locate "Recently Deleted": Under the "Locations" or "Favorites" section, scroll down until you find "Recently Deleted." Tap on this folder to open it.
- Review Items (Optional but Recommended): Just like with photos, take a moment to review the files within the "Recently Deleted" folder. If there's anything you wish to restore, tap and hold on the file, then select "Recover" from the context menu.
- Initiate Deletion: In the top right corner of the "Recently Deleted" screen, tap the "Select" button.
- Select All for Permanent Deletion: After tapping "Select," you'll see options appear at the bottom. To delete everything in the folder, tap "Delete All" in the bottom left corner.
- Confirm Permanent Deletion: Your Apple iPhone will ask for confirmation: "Delete X Items? This action cannot be undone." Tap "Delete X Items" to permanently remove the files and free up the corresponding storage space.
3. Emptying "Trash" Mailboxes in the Mail App
Email attachments, large messages, and general email clutter can surprisingly consume a significant amount of space on your Apple iPhone, especially if you have multiple email accounts configured. When you delete an email, it's typically moved to a "Trash" or "Bin" mailbox within the Mail app, depending on your email provider's settings. These emails often remain in the trash indefinitely or for a prolonged period, continuing to occupy space until manually purged.
Step-by-Step Process:
- Open the Mail App: Tap the "Mail" app icon on your Apple iPhone's Home screen. It typically looks like a blue square with a white envelope.
- Access Mailboxes: Ensure you are on the "Mailboxes" screen. If you're inside an inbox, tap the "Mailboxes" button in the top left corner to return to the main list of your mailboxes.
- Locate Trash Mailboxes: Scroll down to find the "Trash" or "Bin" mailbox for each of your configured email accounts. Some accounts might have a unified "All Trash" mailbox. Tap on a specific "Trash" mailbox you wish to empty.
- Initiate Deletion: Once inside a "Trash" mailbox, tap the "Edit" button in the top right corner of the screen.
- Delete All Emails: After tapping "Edit," you'll see a "Delete All" option appear in the bottom right corner. Tap "Delete All."
- Confirm Permanent Deletion: Your Apple iPhone will prompt you to confirm: "Delete All?" Tap "Delete All" again to permanently remove all emails from that specific trash mailbox.
- Repeat for All Trash Mailboxes: If you have multiple email accounts, repeat steps 3-6 for each "Trash" or "Bin" mailbox to ensure all deleted emails across your accounts are permanently removed.
4. Deleting "Recently Deleted" Conversations in the Messages App (iOS 16+)
Introduced with iOS 16, the Messages app on your Apple iPhone gained a "Recently Deleted" feature, offering a safety net for accidentally deleted conversations. When you delete a message thread, it's moved to this special folder, where it resides for 30 to 40 days before permanent removal. Manually emptying this folder can immediately free up space, especially if you deal with many attachments in your messages.
Step-by-Step Process:
Note: This feature requires your Apple iPhone to be running iOS 16 or a later version.
- Open the Messages App: Tap the "Messages" app icon on your Apple iPhone's Home screen. It's the green bubble with a white speech icon.
- Navigate to Filters (if enabled): If you have "Filter Unknown Senders" or other message filters enabled, you might need to tap "Filters" in the top left corner to reveal the full list of message categories.
- Locate "Recently Deleted": On the main Messages screen, scroll down. You should see a "Recently Deleted" option under the list of your conversations. Tap on it.
- Authenticate (if prompted): Similar to Photos, your Apple iPhone might require Face ID, Touch ID, or your passcode to access the "Recently Deleted" conversations.
- Review Conversations (Optional but Recommended): Before proceeding, quickly review the conversations listed. This is your last chance to recover any message threads you might want to keep. To recover a conversation, tap on it, then tap "Recover" in the bottom right corner, and confirm "Recover Message."
- Initiate Deletion: In the top right corner of the "Recently Deleted" screen, tap the "Edit" button.
- Select Conversations for Permanent Deletion: You can either individually select conversations by tapping the circle next to them or, to delete all, tap "Delete All" in the bottom left corner.
- Confirm Permanent Deletion: Your Apple iPhone will prompt you with a warning: "Delete X Conversations? This cannot be undone." Tap "Delete X Conversations" to confirm. The selected message threads will now be permanently removed from your device, freeing up the associated storage space.
5. Clearing Safari & Other App Caches / Offloading Apps
While not a traditional "trash" folder, accumulated browser data (history, website data, cookies) and app caches (temporary files generated by apps) are significant contributors to digital clutter on your Apple iPhone. Regularly clearing these can reclaim substantial space and often resolve performance issues within apps. Offloading apps, though not a deletion of "trash," helps manage app data efficiently without fully removing the application.
Step-by-Step Process for Safari:
- Open Settings: Tap the "Settings" app icon on your Apple iPhone's Home screen.
- Scroll to Safari: Scroll down the Settings menu until you find "Safari" and tap on it.
- Clear History and Website Data: Scroll down within the Safari settings and tap on "Clear History and Website Data."
- Confirm Clearing: A pop-up will appear asking for confirmation: "Clearing will remove history, cookies, and other browsing data. Open tabs will remain open." Tap "Clear History and Data" to proceed. This action will remove all browsing history, cookies, and website data, effectively emptying Safari's digital cache.
Step-by-Step Process for Other App Caches (General Method):
- Most apps do not offer an in-app "clear cache" button for the user to access easily. For many third-party apps, the most effective way to clear their accumulated data (which acts as their "trash") is to delete and reinstall the app.
- Delete the App: Press and hold the app icon on your Home screen until a menu appears. Tap "Remove App," then "Delete App," and confirm.
- Reinstall the App: Go to the App Store, search for the app, and re-download it. This will install a fresh version of the app without its accumulated cache. You will need to log back in and set up preferences again.
Step-by-Step Process for Offloading Apps:
Offloading an app removes the app itself but keeps its documents and data, allowing you to reinstall it later without losing personal information. This is ideal for apps you use infrequently but don't want to fully delete.
- Open Settings: Tap the "Settings" app icon.
- Navigate to iPhone Storage: Go to General > iPhone Storage.
- Identify Apps to Offload: The list will show apps sorted by storage usage. Tap on an app you wish to offload.
- Offload the App: On the app's detail screen, tap "Offload App."
- Confirm Offload: A confirmation pop-up will appear. Tap "Offload App" again. The app icon will remain on your Home screen but will have a cloud symbol next to its name, indicating it has been offloaded. Re-tap the icon to re-download and use the app.
Key Features & Comparison of Trash Emptying Methods

Understanding the nuances of each method helps you choose the most appropriate approach for your Apple iPhone's digital hygiene. Here's a comparison of the five methods discussed:
| Method | Type of Data Cleared | Ease of Use | Storage Impact | Data Recovery Window | Pros | Cons |
| 1. Photos App (Recently Deleted) | Photos, Videos | Easy | Significant (if many media files) | 30 days (manual override) | Quickly frees up media storage; clear visual of items. | Requires manual action; can be tedious for many items. |
| 2. Files App (Recently Deleted) | Documents, Downloads, Files | Easy | Moderate to Significant | 30 days (manual override) | Centralized for miscellaneous files; clear visual. | Requires manual action; may not be used by all users. |
| 3. Mail App (Trash Mailboxes) | Emails, Attachments | Moderate | Moderate (especially with large attachments) | Varies by provider (often indefinite until manual purge) | Effective for email clutter; can be done per account. | Can be time-consuming for multiple accounts; easy to miss. |
| 4. Messages App (Recently Deleted) | Message threads, attachments | Easy | Moderate to Significant (if many media messages) | 30-40 days (manual override) | Quickly frees up messaging storage; clear visual. | Requires iOS 16+; often overlooked. |
| 5. Safari & App Caches / Offloading Apps | Browser history, cookies, website data, app temporary files | Moderate | Moderate to Significant | N/A (cleared instantly) | Improves app performance; offloading retains user data. | No "trash" folder; requires re-login for some apps; offloading not a full delete. |
Pro Tips & Optimization for Your Apple iPhone

Beyond the fundamental methods of emptying digital trash, Smart AI Fix provides these advanced tips to keep your Apple iPhone running optimally, maximize its storage, and enhance its security.
- Automate Deletion for Mail & Messages: Many email providers allow you to set how long items remain in the Trash mailbox before being permanently deleted. Check your email settings on the web interface of your provider (e.g., Gmail, Outlook, iCloud Mail) to configure automatic purging. For Messages, while the "Recently Deleted" album has its own timer, for general message retention, you can go to Settings > Messages > Message History and change "Keep Messages" from "Forever" to "30 Days" or "1 Year." Be aware this will automatically delete old messages older than your chosen period.
- Leverage iCloud Photos Optimization: If your Apple iPhone storage is constantly full due to photos and videos, enable iCloud Photos with "Optimize iPhone Storage." Go to Settings > Photos > iCloud Photos. With "Optimize iPhone Storage" selected, full-resolution photos and videos are stored in iCloud, while space-saving versions are kept on your Apple iPhone. Full-resolution versions are downloaded on demand.
- Proactive Storage Management Checks: Make it a habit to regularly check your Apple iPhone's storage breakdown. Navigate to Settings > General > iPhone Storage. This screen offers a visual representation of what's consuming your space, categorizing data by apps, photos, media, and "System Data" (which includes caches). Identifying large offenders can guide your cleanup efforts. For "System Data," performing a full backup and restore of your Apple iPhone can sometimes significantly reduce its size, though this is a more drastic measure.
- Review and Delete Large Attachments: Within the "iPhone Storage" section, under some apps like Messages, you can often find a "Review Large Attachments" option. Tapping this will show you all attachments sorted by size, allowing you to selectively delete bulky media files from conversations without deleting entire threads. This is an excellent way to target specific storage hogs.
- Security Tip: Permanent Data Erasure: For extremely sensitive data, simply emptying the trash or deleting apps might not be enough if you're selling or giving away your Apple iPhone. While iOS offers robust data encryption, to ensure data is absolutely unrecoverable, perform a factory reset via Settings > General > Transfer or Reset iPhone > Erase All Content and Settings. This method securely wipes your device. Always ensure you have a full backup before doing so.
- Consider Alternative Storage Solutions: For persistent storage issues, explore external storage solutions compatible with your Apple iPhone (e.g., Lightning/USB-C flash drives) or rely more heavily on cloud storage services like iCloud Drive, Google Drive, or Dropbox for documents and files that don't need to reside directly on your device.
Frequently Asked Questions (FAQ)

1. Does emptying the "Recently Deleted" folders on my Apple iPhone permanently delete files?
Yes, emptying the "Recently Deleted" album in Photos, the "Recently Deleted" folder in Files, or the "Recently Deleted" conversations in Messages will permanently delete those items from your Apple iPhone. Once you confirm the deletion, these files are no longer recoverable through the Apple iPhone's user interface. This is why it's crucial to review the contents of these folders carefully before initiating a permanent purge. Your only potential recourse after permanent deletion would be to restore your Apple iPhone from a previous backup that contained those files, assuming you have one.
2. How often should I empty the trash on my Apple iPhone?
The frequency depends on your usage patterns. For most users, performing a digital trash cleanup once a month is a good routine to keep your Apple iPhone optimized. However, if you frequently take many photos and videos, download numerous files, or receive many large email attachments, you might consider checking your "Recently Deleted" folders and mail trash more often, perhaps weekly. Checking your "iPhone Storage" in Settings periodically (e.g., every two weeks) can also inform you if a cleanup is immediately necessary, as it highlights which categories are consuming the most space. Regular maintenance prevents storage from becoming critically low and affecting device performance.
3. What if I accidentally delete something important from my Apple iPhone's trash?
If you have accidentally deleted something important after emptying a "Recently Deleted" folder or mailbox on your Apple iPhone, the primary method for recovery is to restore your device from a prior backup. If you have a recent iCloud backup or a backup saved on your computer (via Finder on macOS or iTunes on Windows), you can restore your Apple iPhone to a state from before the accidental deletion occurred. However, be aware that restoring a backup will revert your entire device to that point in time, meaning any data created or modified after the backup was made will be lost. It's a significant step, so always be cautious and double-check before permanent deletion.
Conclusion

Maintaining the digital health of your Apple iPhone is paramount for ensuring optimal performance, sufficient storage, and robust data privacy. As we've explored, the concept of "trash" on an Apple iPhone is distributed across various applications and system areas, requiring a multi-pronged approach to effective cleanup. By diligently following the five comprehensive methods outlined in this guide – from emptying media and file "Recently Deleted" folders to clearing browser caches and managing app data – you empower yourself to take full control of your device's storage.
At Smart AI Fix, we are committed to providing you with the most accurate, detailed, and actionable advice for all your Apple iPhone and technology needs. Implement these strategies today to transform your Apple iPhone experience, ensuring it remains swift, responsive, and free from unnecessary digital clutter. Trust Smart AI Fix to be your guide in navigating the complexities of modern technology, one expert solution at a time.
